If you are looking for a Free VMS to manage and record your IP cameras, chances are you are going to like the Luxriot Evo VMS, which is one of the best free IP camera software. Just keep reading to learn more.

I know some people that visit this blog are familiar with professional CCTV terms, but other visitors may not. So Let me quickly explain what a VMS is used for.
What is a VMS ?
A VMS (Video Management System) is a software designed to manage video for surveillance applications, it's also known as Video Management Software.
It's important to understand the difference between basic security camera software that is designed to handle inexpensive cameras for home and small office applications and the VMS which is a professional solution.
Watch the video below to see what VMSes usually are capable of...
Original video from Luxriot YouTube Channel
When installing a software for professional applications, you definitely need to use a VMS instead of using a free security camera software that is designed for homes or small offices (such as the Blue Iris Software).
If you just happen to have some mix of different IP cameras and you want to manage and record them, it's necessary to buy a VMS from a company such as Milestone, OnSSI, ISS, Digifort, Myrasys or any other professional developer.
The Free VMS
It's hard to find a professional VMS that is free unless you buy some IP cameras from a manufacturer and get a basic free version. So basically the company can make a profit on the equipment and give you the VMS for free.
But the good news is that I found a VMS that you can use for Free.
It's the Luxriot EVO which allows you to manage and record up to 9 cameras.
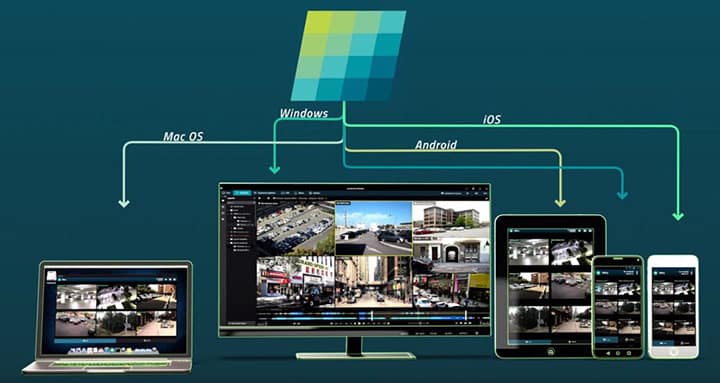
If you have a small installation that requires a robust VMS, this can be a good solution since the software is stable and has some interesting features.
While testing the software, I found an interesting feature called Podcast which allows you to stream an IP camera directly to YouTube, Wonza or other services that use the RTMP (Real Time Messaging Protocol). It's really cool 😉
==> To learn more about this feature, please read the article: Free software to stream IP camera to YouTube Live.
Luxriot EVO Features
The Luxriot EVO (free version) has the following features:
Records up to 9 IP cameras;
Supports over 4000 camera models;
Runs on Windows 64-bit;
Single remote connection;
Live Podcast (stream to RTMP Services);
Setup Wizard for easy installation;
Watchdog.
Software Overview
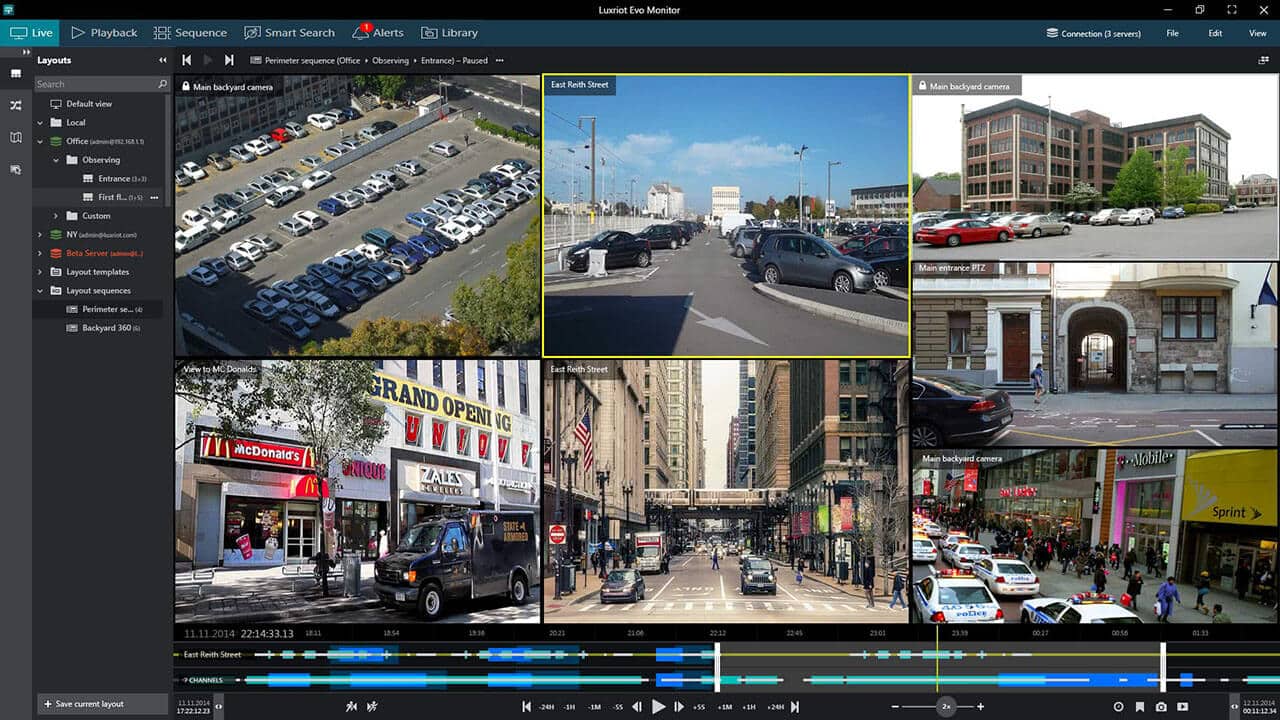
The software has a clean and intuitive interface which is very easy to use.
On the left side, there's the traditional tree with all the cameras that can be dragged to the right side. The layout can be changed and saved according to your needs.
(click to enlarge)
You can easily alternate between "Live" and "Playback" screen buy just clicking the buttons on the top of the software. There's also a button for "Sequence", "Smart Search", the information about pending " Alerts" and a "Library" button.
A timeline shows the information with colors for continuous or event recording.

Luxriot EVO Download
You can download the Luxriot EVO for Free, just click the link below:
Luxriot EVO Installation
The installation is very simple, just execute the .exe file and follow the instructions
Step 1 - Software installation
See the following pictures for the step-by-step process and just click to enlarge the images if you want to check the details...
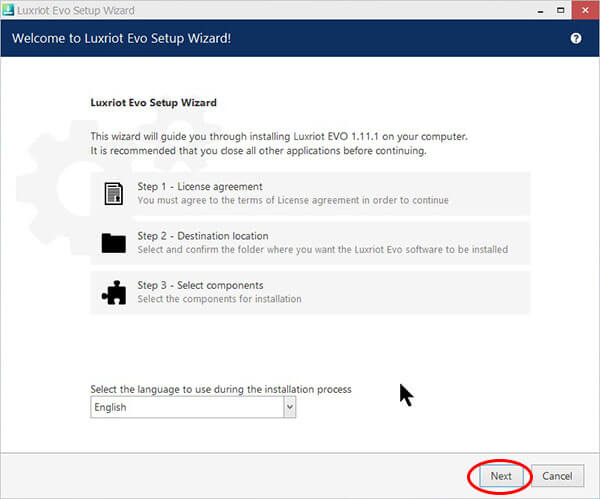
Click "Next"
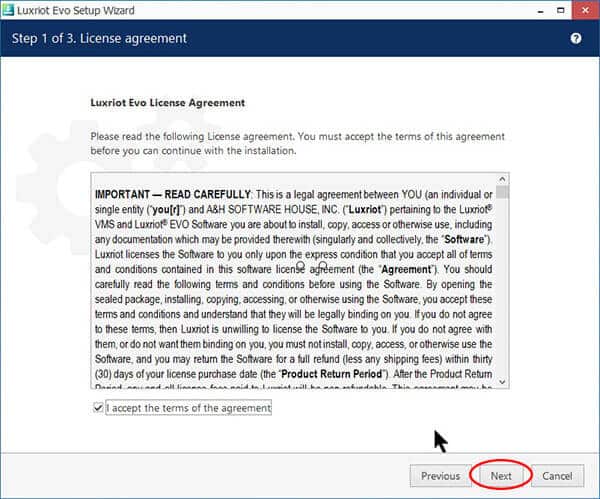
Read the Agreement and click "Next"
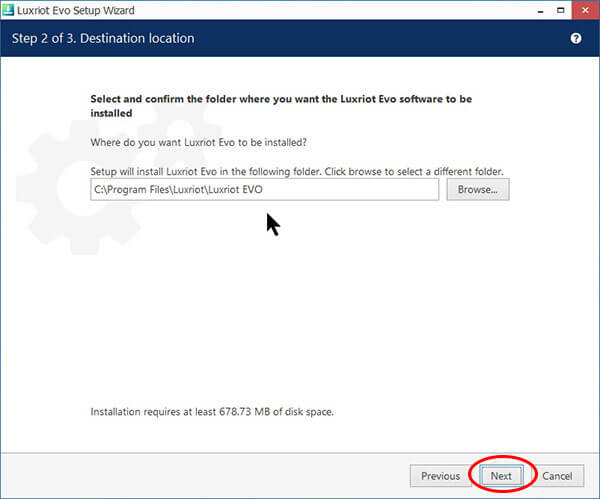
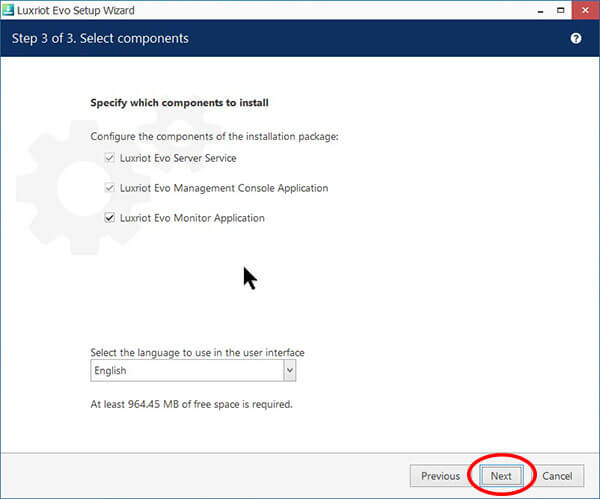
Usually, you don't need to change the default installation directory, so just click "Next" to proceed with the installation and choose the language.
Set the destination and click "Next"
Choose the language and click "Next"
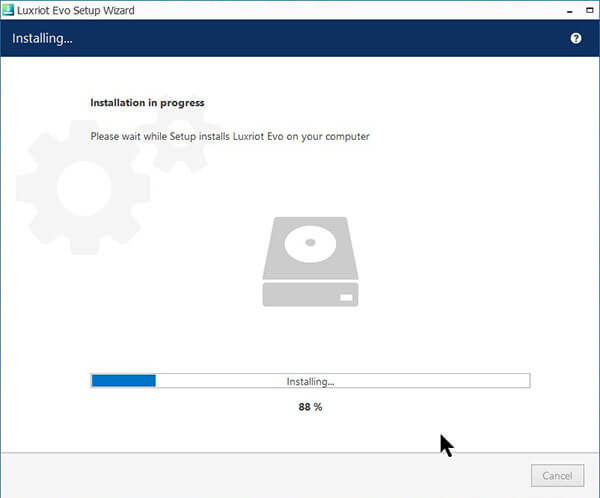
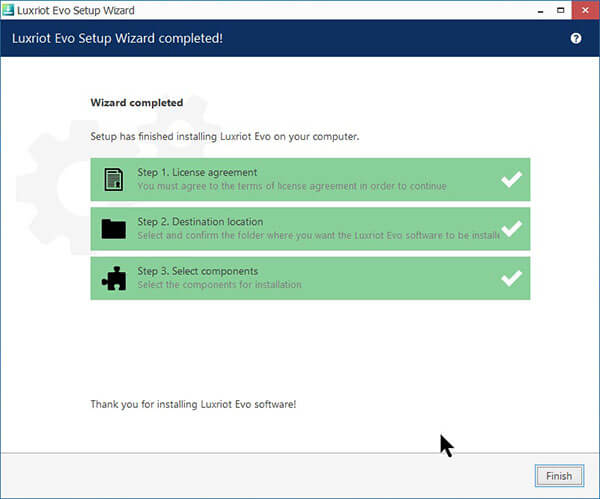
The installation process is very fast. The Wizard shows everything in green color indicating that the installation was successful. Click "Next" to continue.
Just wait for the installation
Installation completed - click "Next"
Step 2 - Server setup
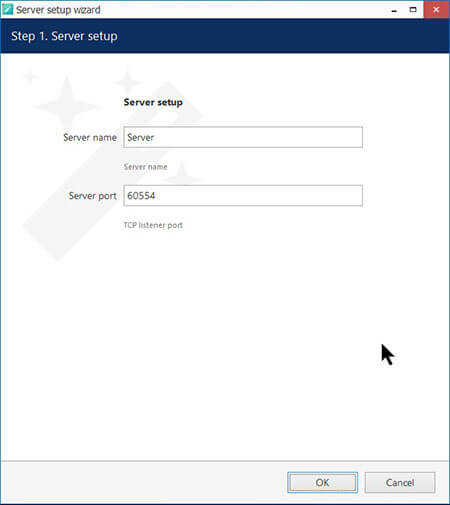
In the next step, you can check the server name and port number. I recommend keeping the server port number the way it is. (Change the server name only).
See the server name and port info
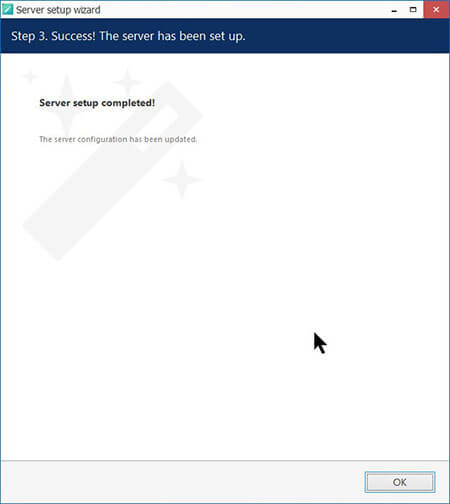
Setup is completed
Step 3 - License
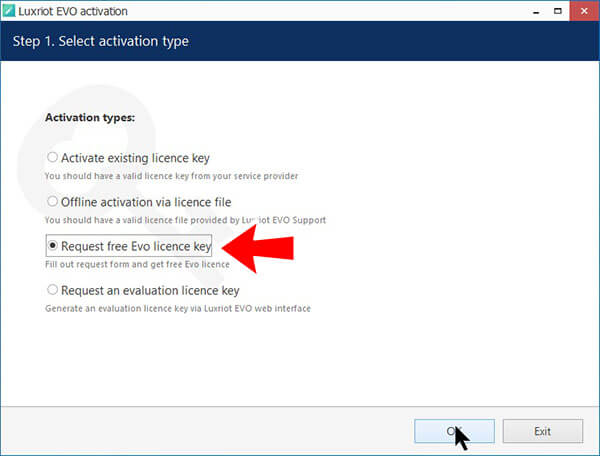
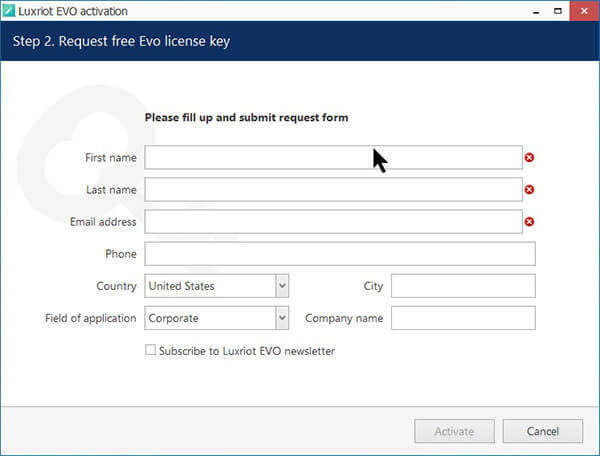
Check the option to request a Free license and click "OK". Next, you just need to fill the information and click "Activate" to get your license.
The computer must be connected to the Internet....
Request the license and click "OK"
Fill the data and click "Activate"
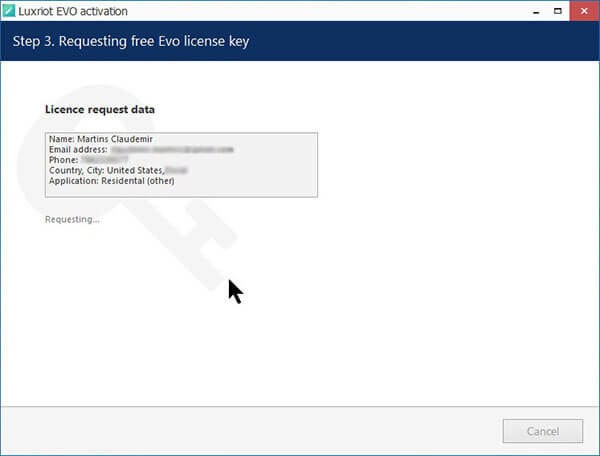
Just check your data to make sure everything is correct.
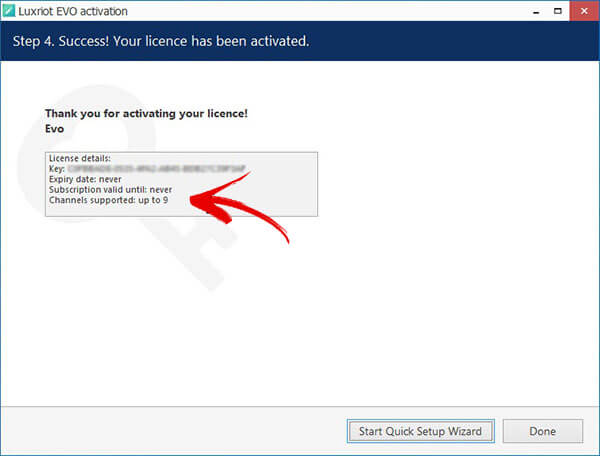
You can see the number of cameras available (9) and the "never expire" info.
Check your data and wait...
The license is OK - Start the Wizard
Step 4 - Create a password
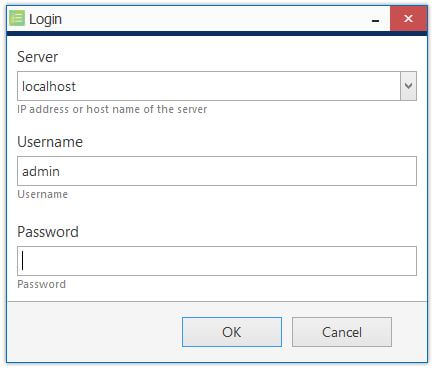
After the installation, you need to create a password for the server.
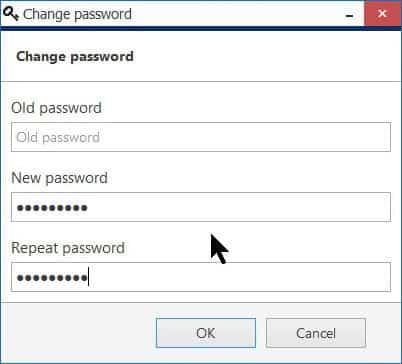
Just click "OK" (there's no initial password) and create a new password.
The software forces you to create a strong password which must contain:
- A minimum of 8 characters.
- Must contain at least 2 Uppercase letters.
- Must contain at least 2 Lowercase letters
Don't type a password - click "Enter"
Create a new password
Step 5 - Find the IP cameras (Auto discovery)
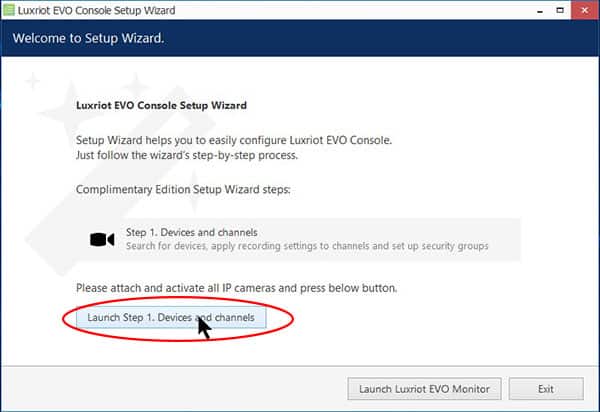
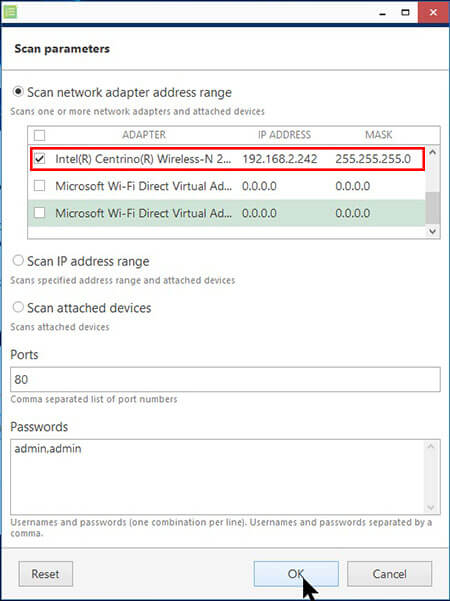
In this step the software looks for IP cameras in your network, just Launch the Wizard and choose the Ethernet interface the computer is connected to, so the software can scan the network and bring the results. (see following pictures).
Click Launch Step 1 - to search for the IP cameras
Select the Ethernet interface the computer is connected to
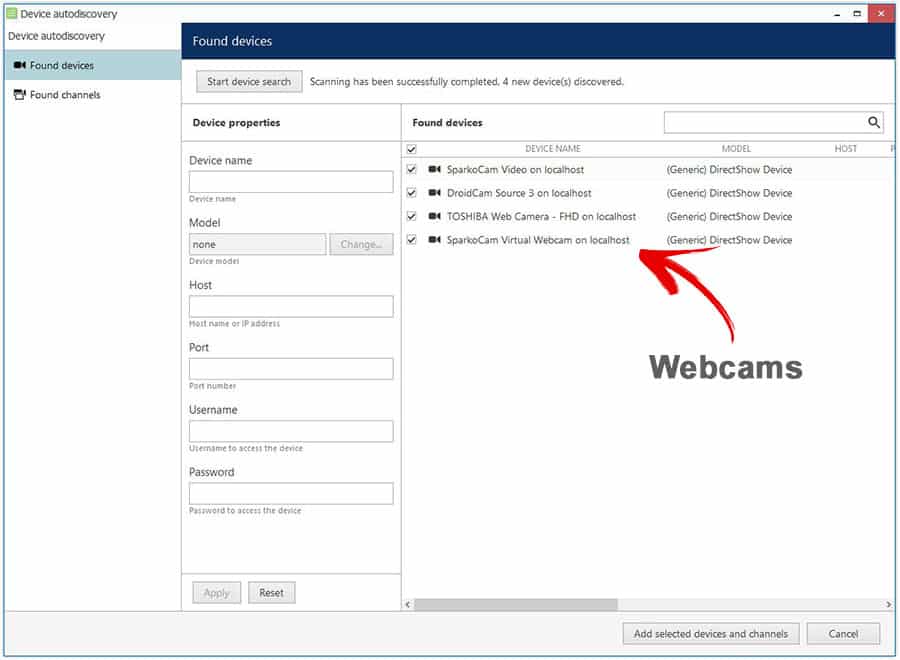
The next screen shows the cameras the Device auto discovery found.
As you can see, only my Webcams were available.
For some unknown reason, the software could not find my Samsung SNB-6004 and Intelbras VIP 1120B (OEM Dahua) camera. They were connected to the same local switch, even with the Windows firewall and anti-virus were disabled.
Step 6 - Find the IP cameras (Manually)
If the IP cameras don't show up in the software (like mine), just try to add them manually. Open the Luxriot console (click the icon on desktop)

Click the button "New Device" to add an IP camera.

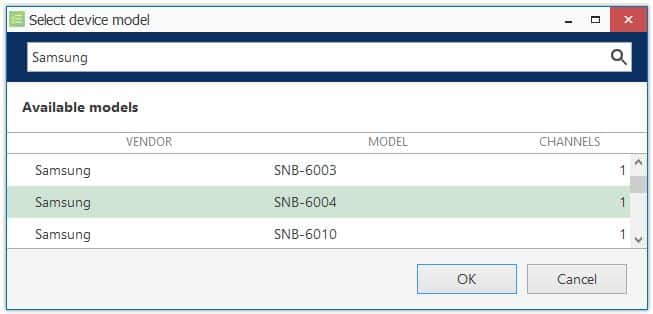
Give your camera a title and click the button "Select Model"
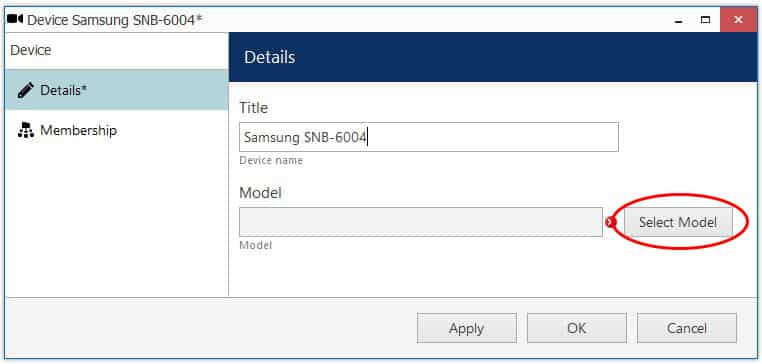
Choose your camera model from the list and click "OK".
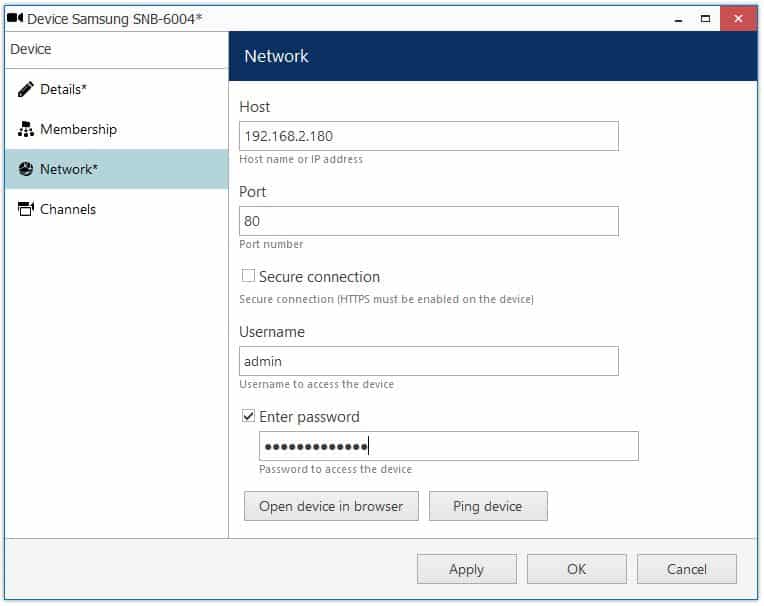
Click on the Network Menu on the left side and fill the information on the right side.
Fill the camera IP, port, username, and password and click "Apply" --> "OK"
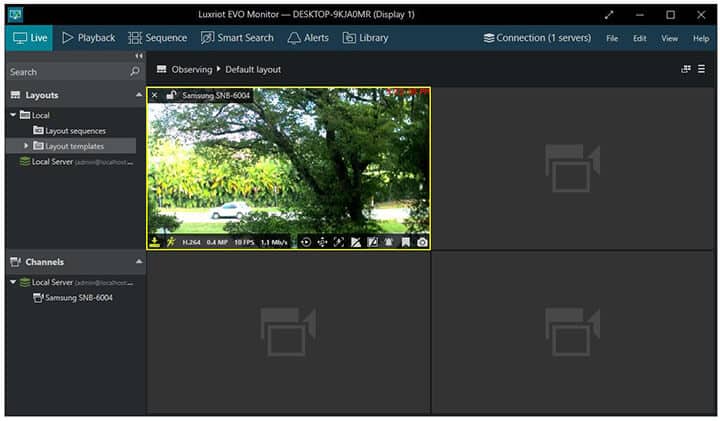
Part 7 - Open the Luxriot EVO Monitor
And now your camera is live in this awesome Free VMS...
Just repeat the last step to add new cameras and if you don't find the brand you are looking for (just like I didn't find the Intelbras model), use the ONVIF protocol.
Luxriot Software Professional version
The free version is very good for small projects, but if you want to add more channels and enable other features you can try the Luxriot Evo S.
Extra modules
Intelligent applications such as LPR (License Plate Recognition) and FR (Face Recognition) are available as modules you can purchase from Luxriot.
Related article
If you want to learn more about the Luxriot VMS features, I recommend you to read the article Luxriot Evo VMS: How to save IP cameras bandwidth.
Conclusion
As you can see, is very simple to install and setup the Free VMS Luxriot EVO.
The next steps it to explore the software and read the manual to understand how to setup the recording and other features such as the live streaming (Podcast).
I just got a temporary license for professional version, LPR and FR. Later new articles will be available here in the blog.
Want to learn more ?
If you want to become a professional CCTV installer or designer, take a look at the material available in the blog. Just click the links below:
Please share this information with your friends...
