This article shows how to add the X and Y coordinates for an Axis PTZ camera.
It doesn't matter if you are using the old or new web interface; it works anyway.
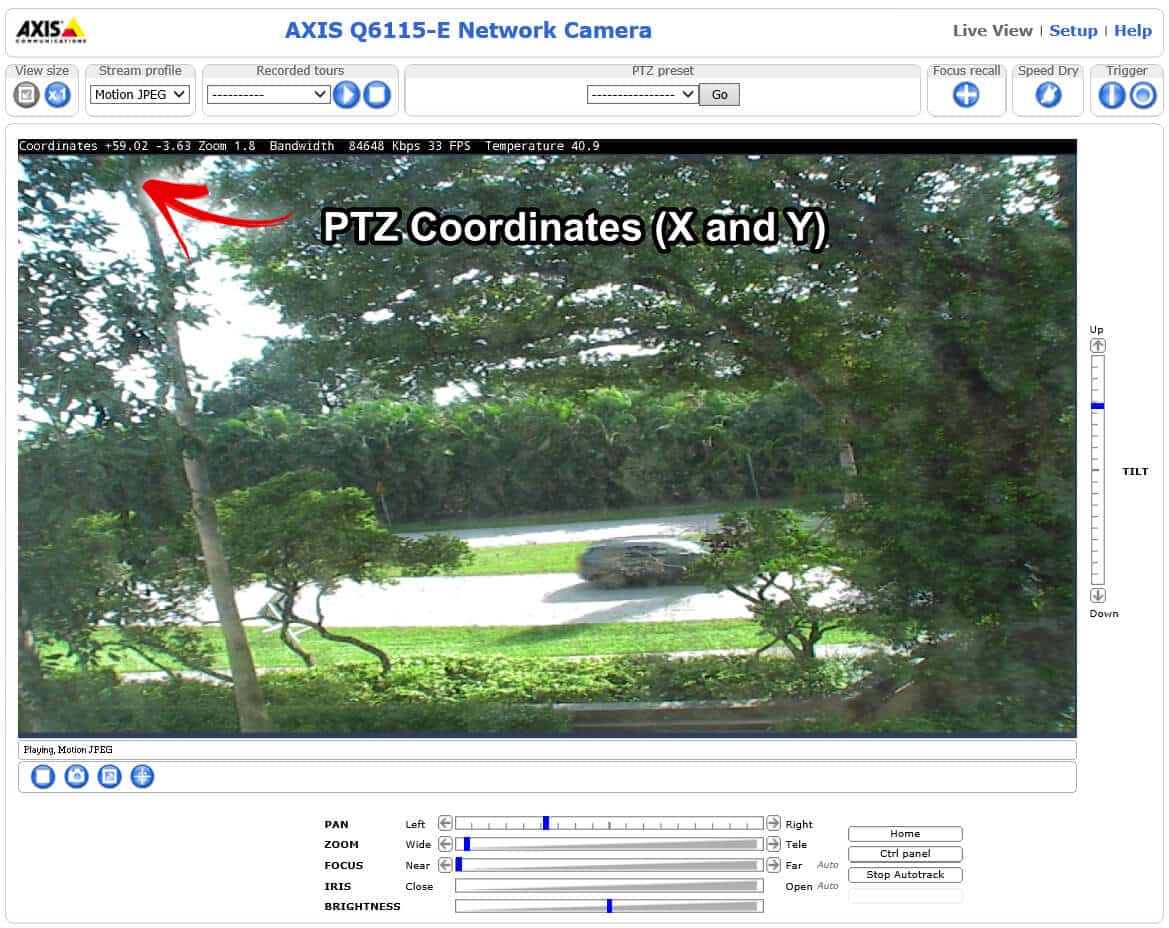
The picture below shows an example of my a camera with the coordinates.

As you can see, the PTZ coordinates (X and Y ) are available along with other information such as bandwidth, Frame Rate, and camera temperature.
It's possible to display different information on old and new cameras.
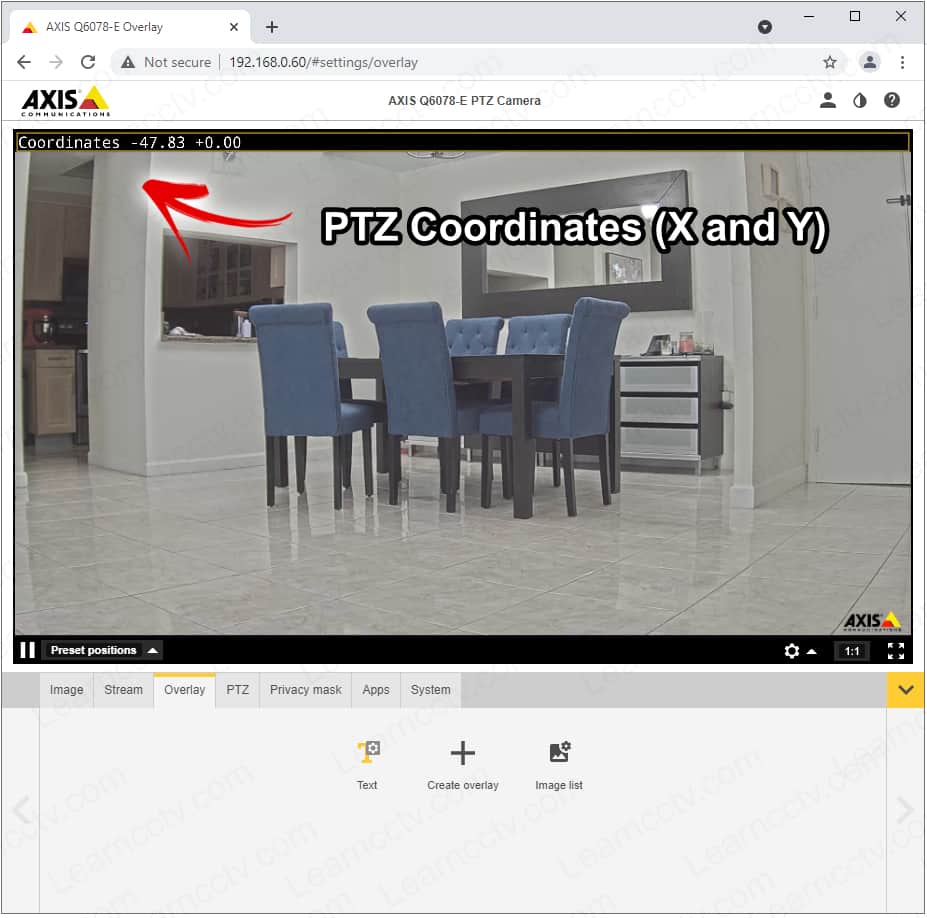
The following picture shows the PTZ coordinates in an Axis camera with the new interface (using the latest firmware).

How to enable the coordinates on the screen
The variables to display the information work for cameras with old and new firmware. See below the list of PTZ related variables (X, Y and Z).
#x | Pan coordinates in two-decimal format. |
#y | Tilt coordinates in two-decimal format. |
#z | Zoom coordinates (1–19999). |
#Z | Zoom magnification in one-decimal format. |
You just need to insert them in the overlay text.
It's possible to use a combination of texts and variables.
Cameras with the old interface
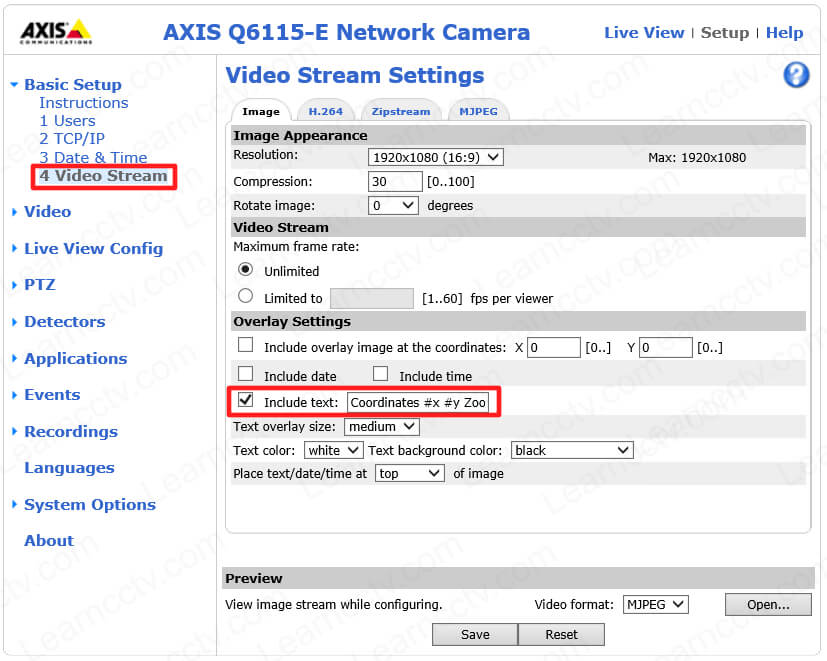
Here are the steps to display the coordinates on the camera with an old interface:
- Open the menu Basic >> Video Stream >> Overlay Settings
- Check the "Include text:" box
- Enter the text and the variables (#x #y #z #Z)
- Format the text and background
- Choose where you want to place the text
- Save the configuration
The picture below shows an example of a camera with the old firmware.

As you can see, the process is straightforward.
==> To learn more about overlay settings and variables for Axis cameras, read the article: How to Add Text Overlay to Axis Cameras.
Cameras with the new interface
The process is similar for cameras with the new interface.
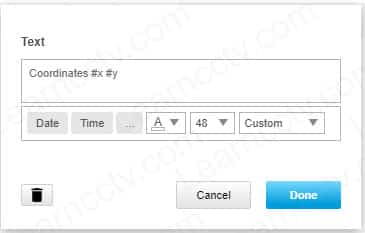
Here's the step-by-step:
- Open the menu Overlay
- Click the "+" sign to create an overlay
- Select the option "Text"
- Enter the text and the variables (#x #y #z #Z)
- Format the text and background
- Choose where you want to place the text
- Save the configuration


And it's done.
Now you can enjoy the Overlay text on the screen.
I hope this article can help you; please share it with your friends.