In this article, I explain how to use multicast in Axis cameras.
Here you can understand how the multicast works and how to test it.
This is not just theory. I've tested video streaming via multicast with my Axis P1365 MK II camera, so you can see some real examples of how it works.
The picture below shows an Axis camera using multicast in the VLC software.
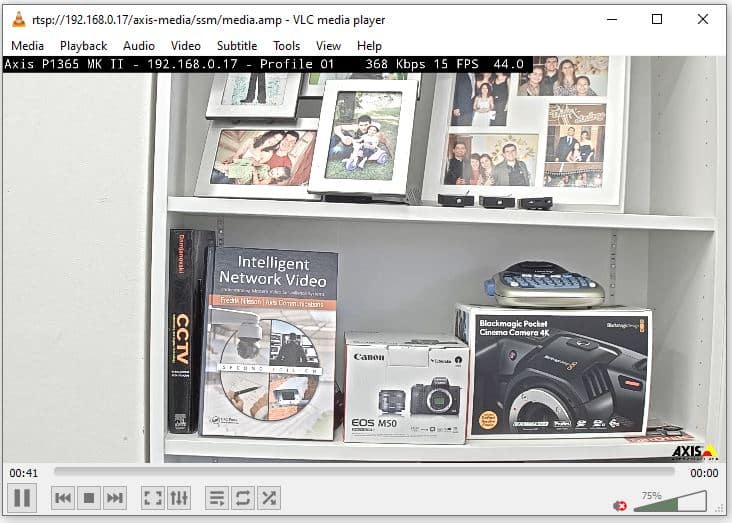
Axis P1365 MK II on VLC via multicast
There are different ways you can have your camera working with multicast.
Keep reading to understand the details (believe me, they are very important).
Pay attention to the 3 methods described in this article:
1. Any-source Multicast (ASM)
2. Source-specific Multicast (SSM)
3. Always multicast
>> Important:
Let's get started with multicast for security cameras.
Multicast and Unicast for security cameras
OK, the first thing we need is to understand how multicast works.
Let's compare a network diagram with security cameras using Unicast and Multicast and then discuss how to implement multicast correctly.
Unicast
The following diagram shows an Axis camera ready to send a video stream to two different computers using the traditional method via Unicast.

Security camera using Unicast (click to enlarge)
In this scenario, it's necessary to send a separate video stream to each computer.
That's why we use the name "Unicast", which is a 1 to 1 relationship.
Now, take a look at the following diagram to understand how the camera sends a video stream to both computers in the network using their IP addresses.

Network Diagram: Security camera using unicast (click to enlarge)
As you can see, the camera established a connection to each computer and streamed the video twice, making it use more resources (bandwidth, CPU, memory).
This is just a random example where each video stream uses 1Mbps.
Now imagine more computers in this scenario...
The camera will run out of resources pretty quickly.
Here's where the multicast comes to the rescue.
Multicast
Now let's take the same scenario and use multicast to send the video stream.
The following picture shows how the IP camera can communicate via multicast.

Axis IP camera using multicast (click to enlarge)
In this scenario, the camera can send the video stream to a Multicast IP (group).
The camera sends the video stream to a switch that distributes it to the computers.
That's pretty smart, huh? 🙂
Take a look at the diagram below.

Axis camera Multicast (click to enlarge)
As you can see, the camera sends only one video stream to the switch which and the computers can pull it from there. Now the camera resources are not impacted.
=> That's a simplified explanation of how multicast works. There are many more details on the topic, but I intend to make things simple to understand.
Now, let's understand the different ways you can use multicast on Axis cameras.
Multicast on Axis cameras
Now, let's understand the different ways you can use multicast on Axis cameras.
You can have your Axis camera streaming video to the network.
1. Any-source Multicast (ASM)
The client (computer or other devices) sends a request to the Axis camera, Encoder, or any other Axis streaming device and asks for multicast as the transport method.
No multicast-specific network parameters are shared in the first communication between the client and the Axis device. These parameters are negotiated later.
Here's a picture that illustrates this process.
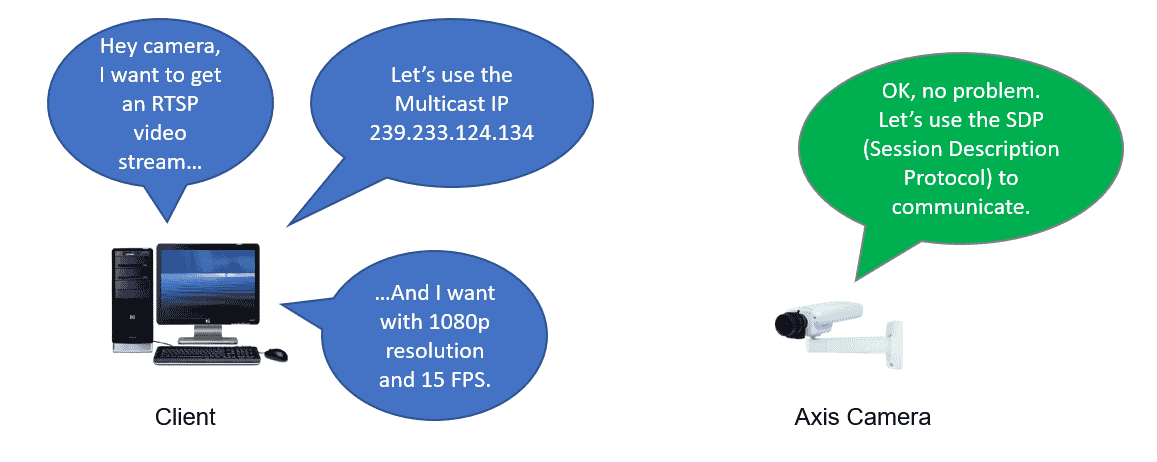
Axis ASM (click to enlarge)
You need to use the software on the client to communicate with the camera.
Here's the trace I got from the computer (client) and camera communication.
(Red is the client and Blue is the Axis camera).
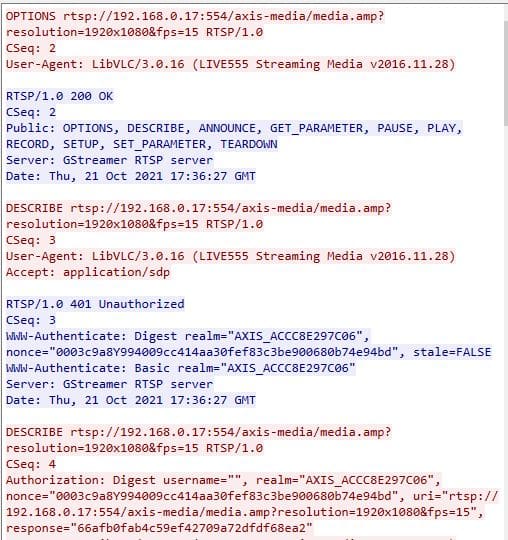
As you can see, the client initiates the communication by sending an RTSP request to the camera (camera's IP is 192.168.0.17) on port 554 using the Live555 streaming media and then waits for the camera to reply.
Note that the resolution (1920x1080) and the Frame Rate (15 FPS) are informed.
The Axis camera responds and informs the Options to control the video stream.
Since I did not provide the credentials upfront in the command, a message pops up on the screen asking for the username and password.
As soon as I enter the username/password, the authentication goes through. The devices can communicate based on how to decode the video stream (provided by the shared SDP file).
The communication proceeds, and the camera starts streaming the video.
2. Source-specific Multicast (SSM)
In this method, the multicast network parameters are pre-configured in the Axis camera (or any other Axis device), and the information is shared in the SDP file.
The client does not specify the network parameters such as the multicast IP address because the Axis device does this.
Here's how the method works...

Axis SSM (click to enlarge)
There's a menu in the camera you can change these parameters.
Just open the setting and go to Plain Config >> Network.

You can find the multicast IP address in the R0 section.
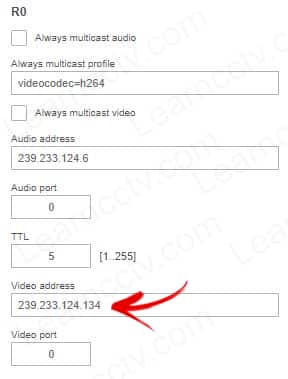
That's the IP that becomes available as part of the multicast group.
When using multicast SSM, the camera dictates the IP that will be used.
See the diagram with the example.

Axis camera multicast diagram (click to enlarge)
As you can see, the camera sends the video stream to the multicast group.
Now the camera uses fewer resources to stream the video to the computers.
Let's take a look at a practical example using software to connect to the camera.
How to use VLC to connect to the Axis camera via multicast
I told you I could show you some real examples, right?
So, here I have the step-step to test multicast using VLC.
- Open the "Plain Config > Network" Menu;
- Write down what is the Multicast address;
- Open Wireshark and create a filter to such address;
- Use VLC to send the command (see below) to the camera;
- Enter the camera credentials;
- Check the results in the VLC and Wireshark.
Use the command rtsp://<camera IP>/axis-media/ssm/media.amp
It's pretty simple. You use this RTSP URL which contains the method (SSM) to request a video stream from the camera using its multicast address.
Do you remember where to check the Multicast address, don't you? 🙂
I showed that before... retake a look at the previous picture that shows the Plain Config > Network Menu and Ro section. The multicast IP is there.

You just need to use this IP to verify the multicast stream in Wireshark.
Attention: You do NOT need to change the IP multicast IP address neither use it to test the video stream. Make sure you understand that part.
Open the VLC media player and go to Media >> Open Network Stream.
Enter the URL command as shown in the picture below: (use your camera's IP).

As you can see, I'm using the RTSL URL to request the camera to send a video stream with HD resolution (1280x720) via Multicast (using the SSM method).
And that's all. You can follow the traffic on Wireshark to make sure the camera is sending the traffic to the multicast group (IP).

The picture shows my Axis P1365 MK II camera as the source and the multicast IP address as the destination using the UDP protocol. So it's working correctly.
Please, please, please make sure you understand this part. It's super important.
- You do NOT send the request to the multicast IP address;
- You do NOT check the box "always multicast video";
- You do NOT check any boxes related to multicast.
I'm repeating this over and over again to make sure you got it right.
It's a bit confusing at first, and people tend to use the multicast address in the VLC RTSP URL or have the impulse to enable every multicast box. Just don't.
When using the SSM method, it's not necessary to have a multicast streaming video all the time. You are going to have it working on demand when asked by the client.
Here's the VLC showing the video stream from the camera...

Here's the trace of the communication between the camera and the VLC software.
(VLC in RED and camera in Blue).
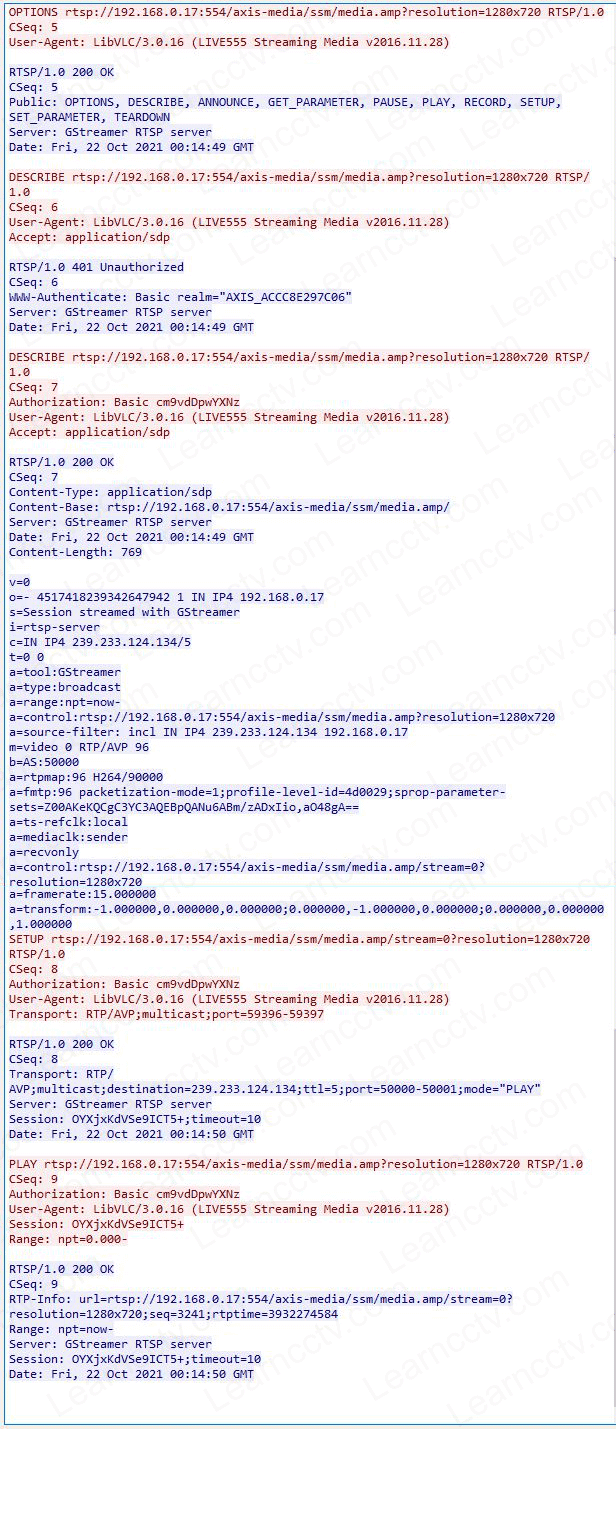
It's essential to be aware that VLC uses Basic authentication.
This authentication method impacts your network security.
3. Always multicast
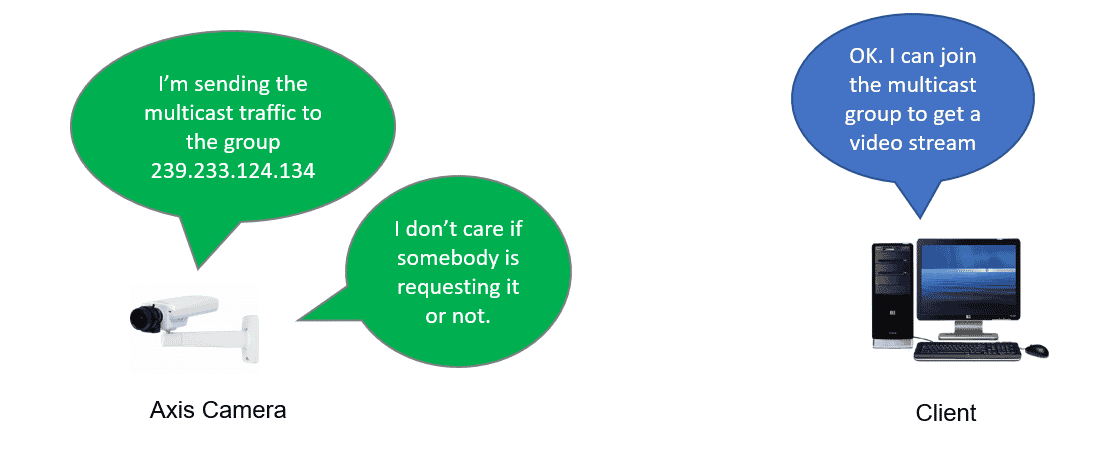
This method allows the Axis device to stream the video to a multicast group even if there's no request from a client, which means the multicast is "always ON".
Yeah, it's dangerous because it sends the video stream to the network, which can be flooded with non-desirable traffic everywhere.
Here's an illustration of how it works...
The communication between the camera and the client is done via HTTP.
RTSP is no longer used for this method. Please make sure to remember that.
To enable always multicast on an Axis device, go to settings >> Plain Config >> Network >> R0 and check the box "Always Multicast".
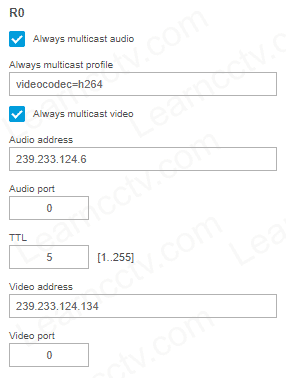
And that's it.
As soon as you hit the "Save" button, the camera starts streaming video in your network using multicast. Any client in the network can join the multicast group.
==> Warning: This method can flood your local network with non-requested traffic. You need to understand how to control the multicast traffic by using switches and routers that work with IGMP and other multicast protocols.
This article does NOT explain how to control the multicast traffic in your network.
You can read my other article here in the blog to learn more...
Using VLC to test the Always Multicast method
OK, let's take a look at how to test this method using the VLC software.
Remember, we need to use HTTP (instead of RTSP) to get a multicast stream.
VLC uses "HTTP Basic Authentication" in this case, so you need to change the configuration in the camera. Plain Config > Network > Authentication policy.
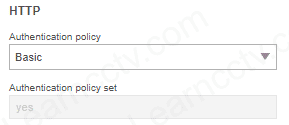
And now it's time to open VLC and use the URL to get a multicast video stream.
Here's the command you can use:
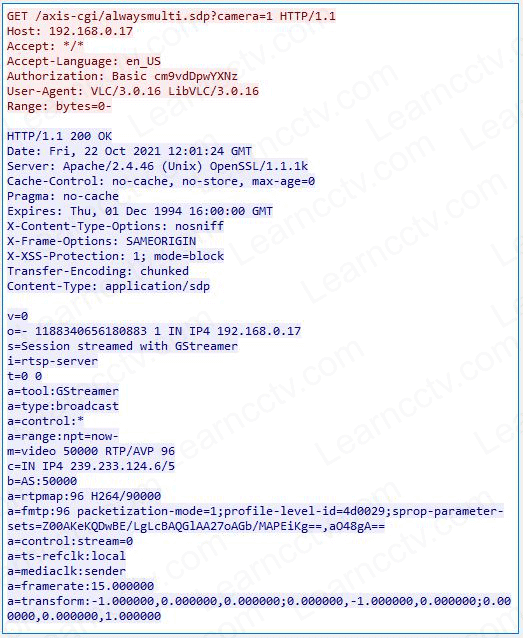
http://<camera IP>/axis-cgi/alwaysmulti.sdp?camera=1
And then you can get the multicast video stream...
Here's the trace captured on Wireshark.
And that's the way you can connect to the camera using VLC and multicast.
Conclusion
You can use multicast to reduce the traffic and resources used by the camera.
There are different methods to accomplish this task, and you need to pick the one that best suits your needs. It's just a question of understanding the details.
I hope this article can help you; please share it with your friends.