In this article, I explain how to add an Amcrest camera to Angelcam.
I tested the setup with an Amcrest 4MP PTZ camera model IP4M-1063EW-AI and it worked as expected. The process is simple and takes about 5 minutes.
Follow these steps to add your camera to the Angelcam platform:
- Check if your camera works in the local network;
- Setup the router port forwarding.
- Setup Angelcam's platform.
==> The configuration also works with other IP cameras, to learn more about the models, check the article: Angelcam camera list.
How the cloud recording works
Let's take a look at how the cloud recording works, and then we can set up the router and the Angelcam server to record the IP camera.
The following picture shows the Amcrest camera connected to a local network streaming the video to the Angelcam server on the Internet.
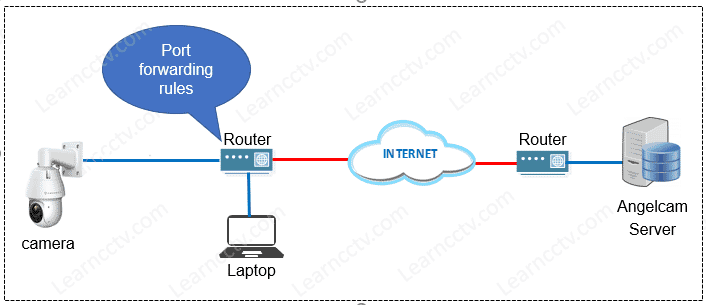
It's necessary to create port forwarding rules in the router to allow the Angelcam server to communicate with the camera via the Internet.
I know, you may be wondering "what is port forwarding?", aren't you? 🙂
If that's the case, I have an article that can help you understand the concept.
Please read the article Port forwarding for DVRs and security cameras.
Local vs remote recording
The camera can use the best video quality recording for the local on a PC or micoSD card, with high-resolution and frame rate.
You can reduce the video quality for remote recording to the cloud in order to save bandwidth and storage space.
The router configuration (port forwarding)
It's necessary to configure the router for port forwarding in order to send the video stream from the camera in the local network to the Angelcam server.
You also need to change the camera's default HTTP port.
Step-by-step Angelcam IP camera setup
Let's dive into the setup and connect the camera to the Angelcam.
Here are the two steps to get the job done.
- Change the IP camera port from 80 to 8081;
- Add a rule for port forwarding in the router;
- Set up the Angelcam server.
I assume you already have an account created on the Angelcam website; if you don't, please just visit the Angelcam website and follow the steps to create it.
3. Setup the router port forwarding
It's time to configure your router to allow the Angelcam server to receive the requests from the Angelcam platform by redirecting the traffic that comes from the Internet. Here's how you can do that...
Just log in to the router and look for the port forwarding configuration.
The menus are different for every router, depending on the manufacturer. Sometimes they use names such as NAT, PAT, Port Forwarding, Port Redirect, etc.
On my router (Netgear C6300), the menu is under the "Advanced --> Advanced Setup --> Port Forwarding " Menu.
The picture below shows the configuration. It's necessary to inform the HTTP port (8081), the protocol (both), and the camera IP address (192.168.0.72).
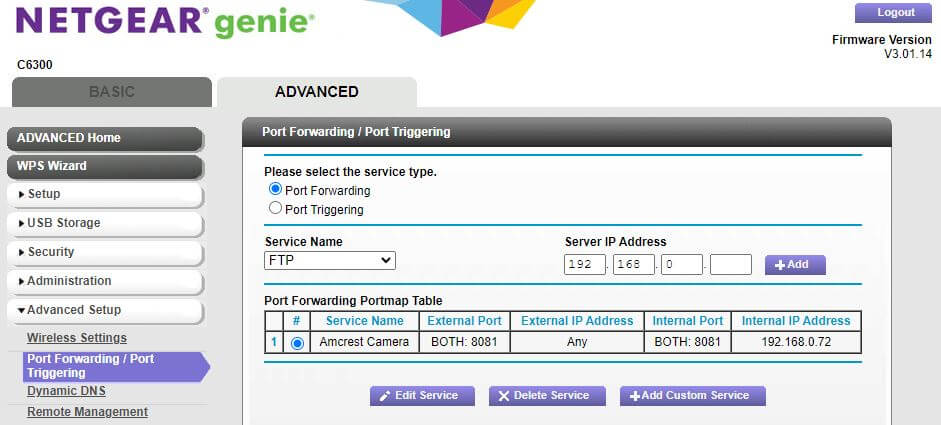
This configuration is basically saying: "Hey router, every time you receive a request from the Internet to the port 8081, please redirect the traffic to the IP 192.168.0.72 port 8081" (which is the IP and port of the camera).
==> Please remember to change the camera's port from 80 to 8081.
4. Setup the Angelcam's platform
Now it's time to configure Angelcam's platform to get the video stream from your DVR. You just need to have some basic information:
- The router's external IP address
- The RTSP command for your DVR
- The RTSP port used by the router (usually 554)
- The user and password for your DVR
- Which DVR profile is better for remote recording
How to connect a DVR to Angelcam
Go to the Angelcam website at https://angelcam.com/cva to create an account if you don't have one, or log in if you already have an account.
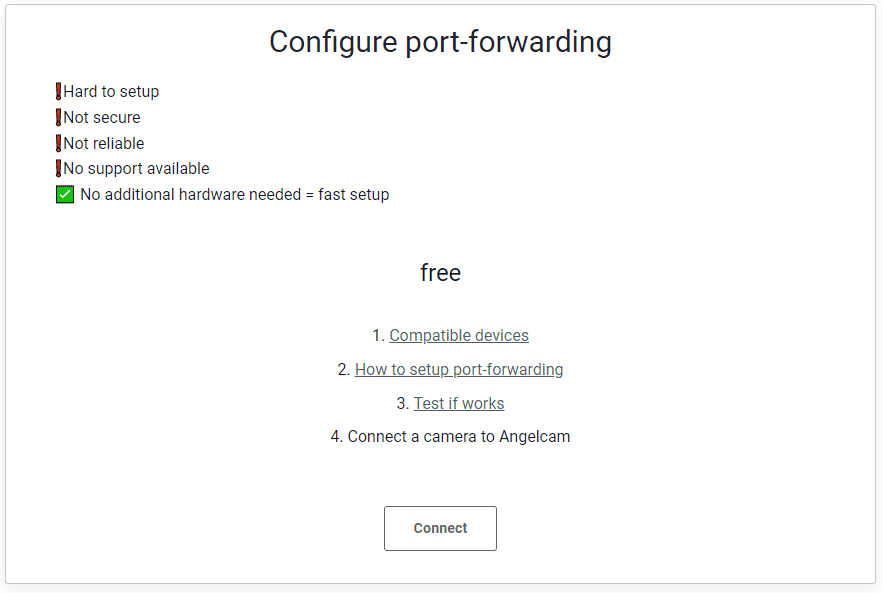
Select the box "Configure port-forwarding" and click on "Connect".
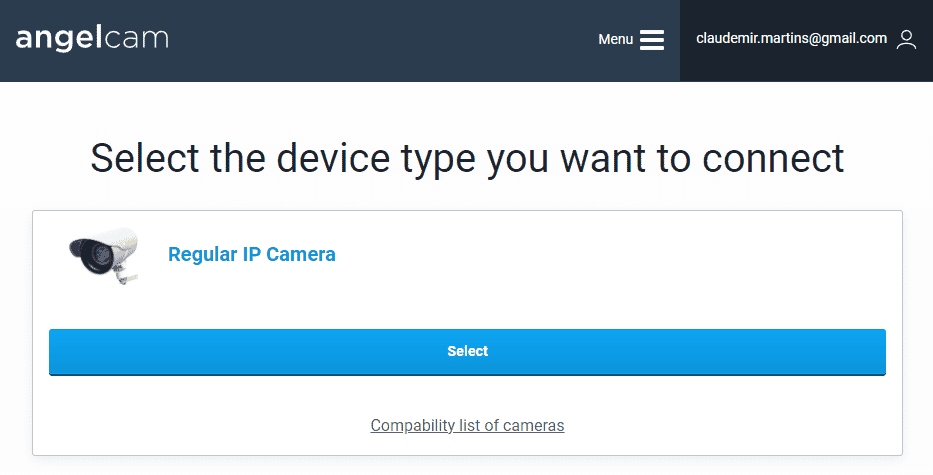
Select "Regular IP camera".
Type your router's external IP address, login, password and port 8081.
The address you see in the picture below will be filled as you enter the info.
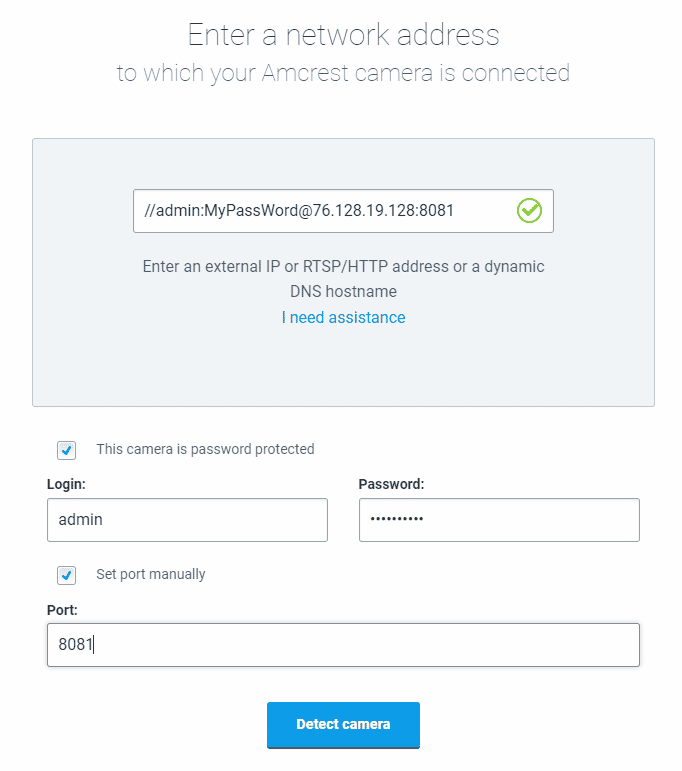
Click the "Detect camera" button and wait for the magic to happen.
The Angelcam server will look for you camera and try to connect.
If everything is OK, you should see the camera online on the platform.
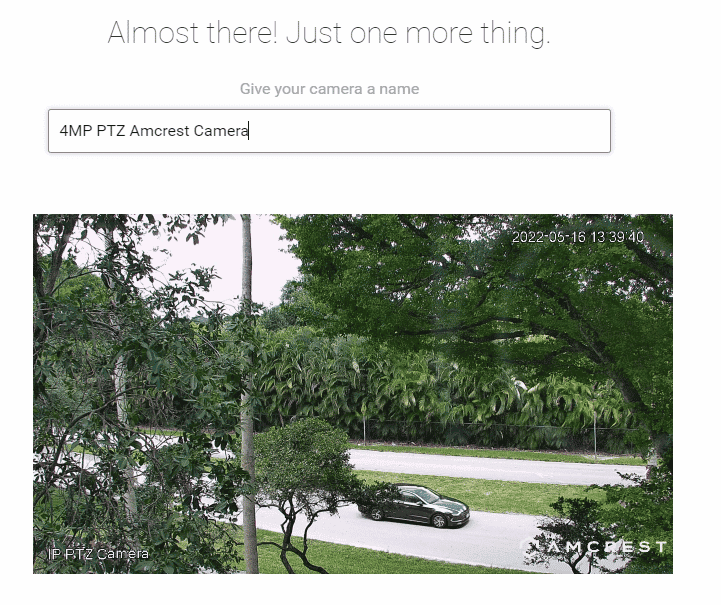
Give your camera a name, and you are done with the setup.
Congratulations, your Amcrest camera is live on the Angelcam platform.
Conclusion
It's easy to configure an IP camera or NVR to stream videos to the Angelcam.
To connect an IP camera to Angelcam, you just need to change the camera's port and set up the port forwarding rules and the Angelcam platform.
I hope this article can help you.
Want to become a better professional ?
If you want to become a professional CCTV installer or designer, take a look at the material available in the blog. Just click the links below:
Please share this information with your friends...
