It's important to learn the Wisenet DDNS setup process to have remote access to the IP cameras and recorders via the Internet.

In this article, I explain everything you need to know to understand how the DDNS works and I show a real example with a camera I purchased on eBay.
As a former Hanwnha Techwin employee, I have a lot of experience with this topic because I used to help customers to solve issues with the Wisenet cameras.
That's why I call this article "The Best Guide", you will what you need here ;(
Som let's see how the Wisenet DDNS works and how to set up a camera...
What is DDNS
DDNS stands for Dynamic Domain Name Server and it's a method used to automatically update the DNS server with the information about the actual IP the local router our device is using at a specific moment.
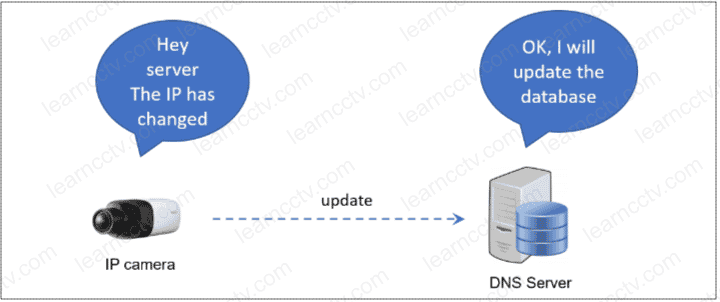
Depending on the Internet connection service you have, your router is given a dynamic IP that changes from time to time and the devices that are on the Internet can't find it anymore thus losing the connection to the cameras or recorders.
If you have an IP camera, Encoder, DVR (Digital Video Recorder) or NVR (Network Video Recorder) in your local network and want to have them available on the Internet, the DDNS service can help you out.
How the DDNS works
Your surveillance device can connect to a DDNS server on the Internet to let it know when the router IP changes so the information is updated.
The DDNS server uses a URL (Universal Resource Locator) which is a name that represents your router actual IP and it's stored on the server database for consulting.
A URL such as https://ddns.hanwha-security.com/mycam is assigned to your Wisenet account to represent the IP camera you have for example.
The DNS serve will keep the information in its database.
URL | Actual IP |
|---|---|
https://ddns.hanwha-security.com/mycam | 200.238.0.1 |
This is just a random URL and IP example (that are not valid)
When the router gets a new IP from the Internet Service provider, the server receives the information and change it, so you don't need to know the new IP but only the URL, which is easier for humans to remember, right? 🙂
The Wisenet DDNs service
Hanwha Techwin has a free DDNS service you can use to create your account and register your devices to have access via the Internet.
It's necessary to configure the IP camera and the DDNS server.
The diagram below shows an example ot the Wisenet camera and the server.
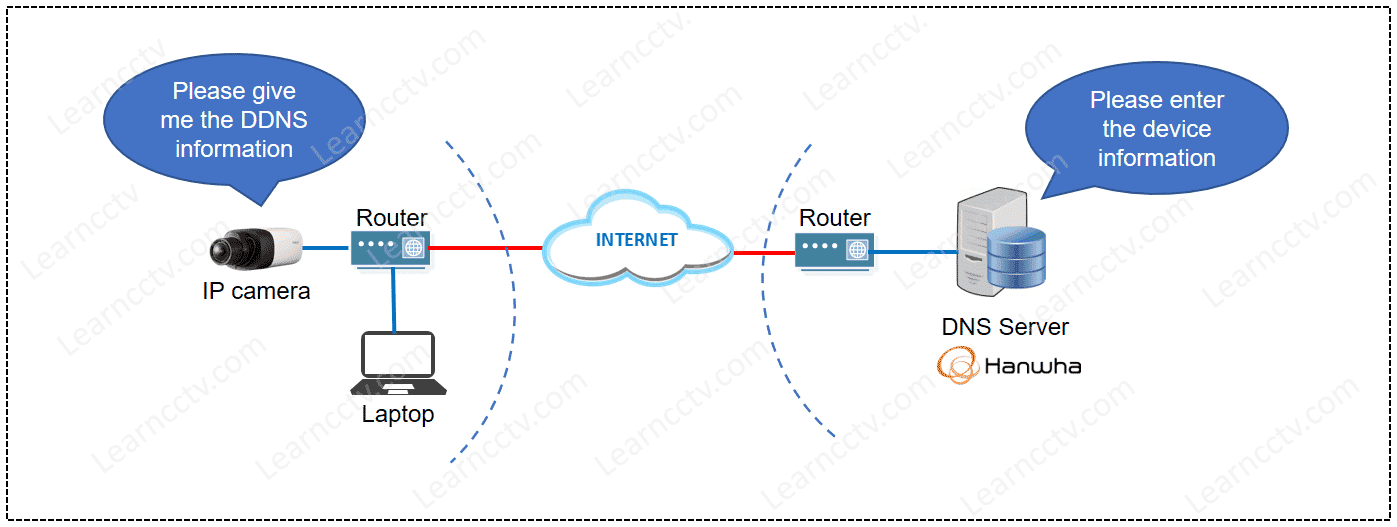
You need to create an account and configure your devices to use it.
To start using the Wisenet DDNS service, (A.KA. Hanwha DDNs) visit the site https://ddns.hanwha-security.com and follow the steps:
- Create a new account
- Register your device
- Set up the device
- Test the connection
The images below show the step-by-step process...
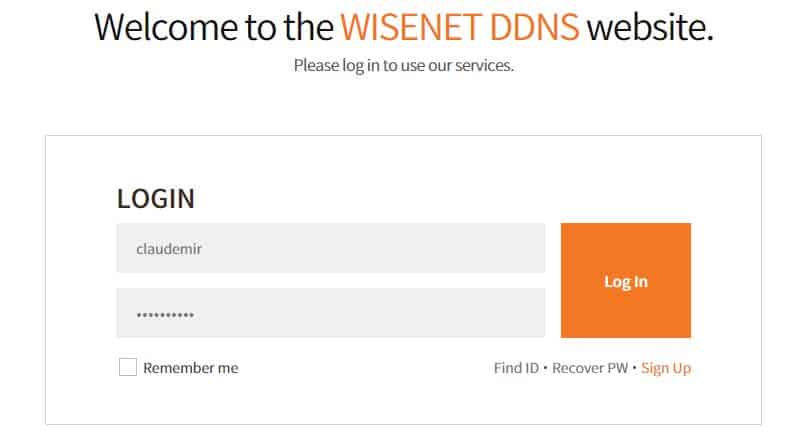
Visit the website to log into your account (or create a new one).
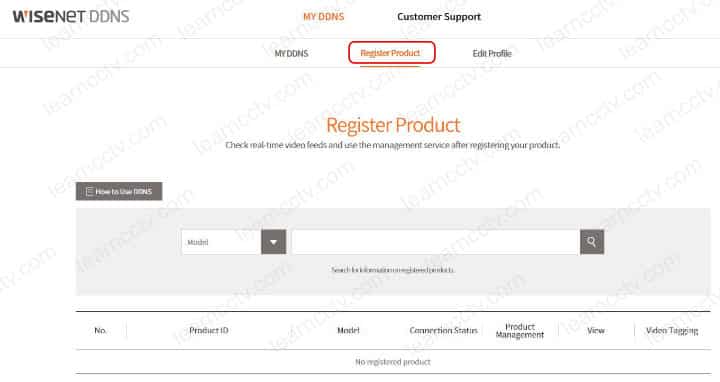
On the top of page click on "Register Product"
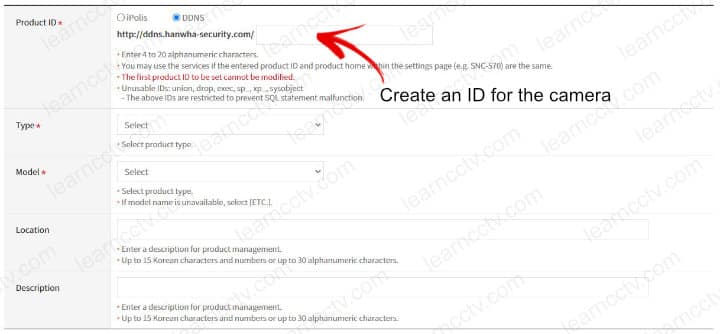
On the product IP page just create an IP for the camera.
You can use something meaningful such as "companynameboxcam1"
Fill the other information, camera type, model, location and description.
And the camera is added to the DDNS server.
The image below shows the camera name, model and status as "ON".
At first this status will be "OFF" until you do the camera setup.
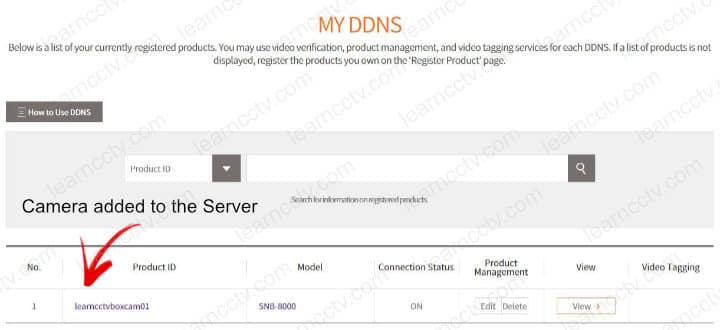
I took the picture after finishing the entire process, so don't worry when you see the status as OFF, this will change in a while. Let's go to the device configuration.
The camera setup
Now it's time to open the camera network menu and look for DDNS.
I have an old SNB-8000 camera manufactured by Samsung Techwin which is the Hanwha Techwin predecessor. If you have a new Wisenet camera the network menu should look similar. Please follow the same principle.
The image below shows the DDNS menu. On the right side, it's possible to enable the "Samsung DDNS" (or Wisenet/Hanwha DDNS) and insert the information.
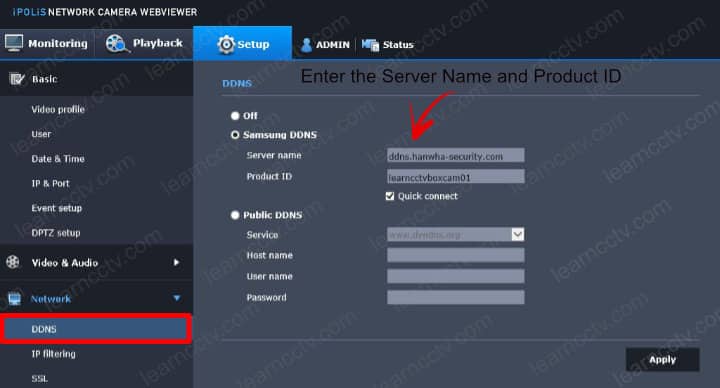
After entering the information click apply and wait for the camera to test the connection, you should receive the "success" message.
If everything is OK, you should see the connection status on the DDNS server change to "ON" and then you will be able to use the service.

The URL https://ddns.hanwha-security.com/learncctvboxcam1 now redirects the connection to my router's IP which today is 73.85.192.4.
Now, every time I want to have access to my camera I just need to use type the URL on a browser and the Wisenet DDNS takes care of the redirection.
When my Internet Service provider changes the router's IP, the camera will find out and send the information to the DNS server to update the database.
Now, I can use the "View" button on the right side to open the connection.

After clicking the button a web browser is launched with the IP and port used on my network, but at this time I should see a connection problem because my router receives the request but doesn't know how to handle it. As shown below.
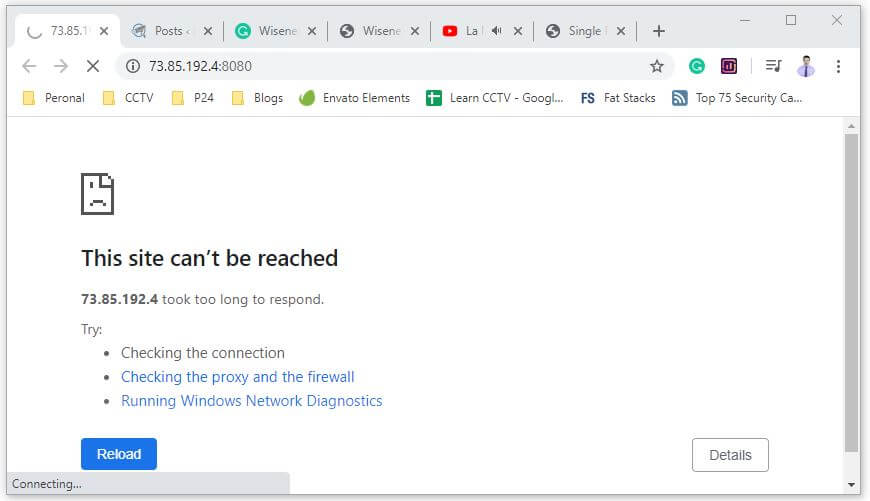
That's normal, no problem here....
Take a look at the browser address to see that the IP address (73.85.192.4) is OK and the port (8080) is also the one I'm using for my camera.
That indicates that the DDNS is doing its job correctly by redirecting the URL to the IP and port on my network. Now you need to work in the 2nd step and set up the router to handle the connection correctly and direct the traffic to the IP camera.
This process is known as port forwarding and it's pretty simple.
Let's take a look at how to do that now...
Port forwarding
It's necessary to enter the information in your router to redirect the traffic that comes from the Internet. I will use my router as a real example for this case.
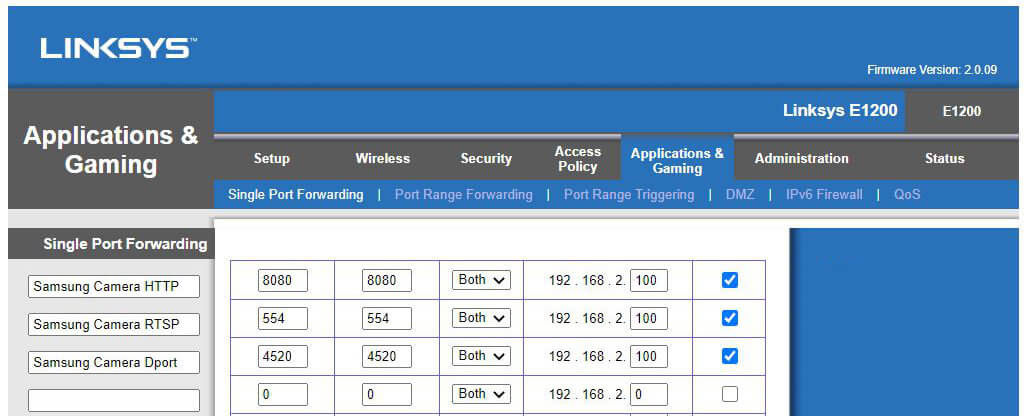
The picture below shows the port forwading configuration in the router.
The ports 8080, 554 and 4520 are redirected to the IP 192.168.2.100 (camera).
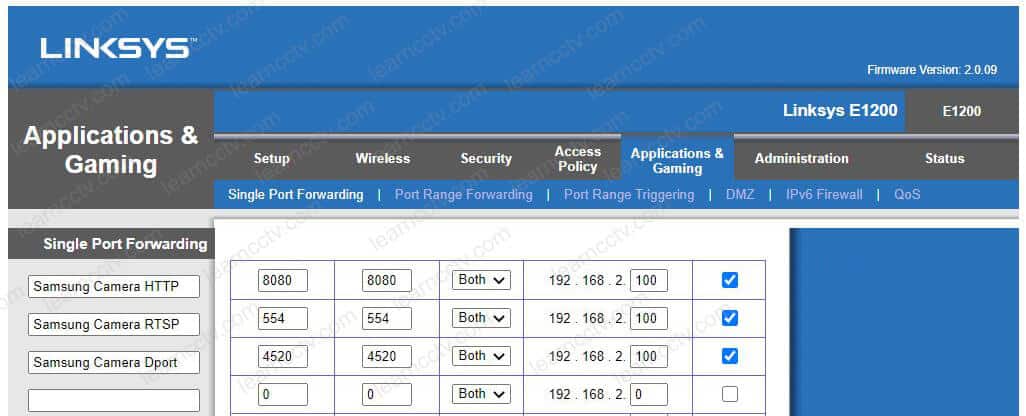
( Click to enlarge )
The ports are the ones used by the camera, you can find the information in the camera's network menu as shown in the image below.

The ports listed here work as follow:
HTTP: Access via a web browser
HTTPS: Secure access via web browser
RTSP: Universal standard for video streaming
Device Port: Used by the Wisenet Software.
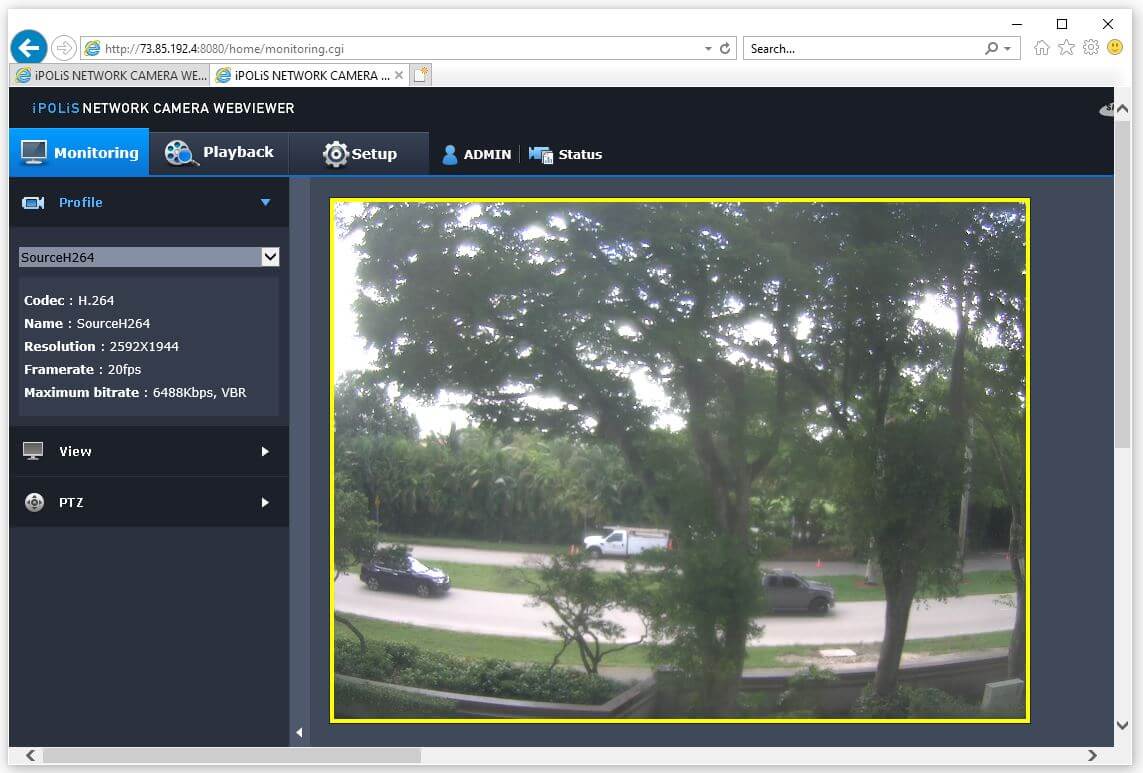
Now the URL https://ddns.hanwha-security.com/learncctvboxcam1 typed on a web browser redirect the traffic to my network and I can log in to the camera.
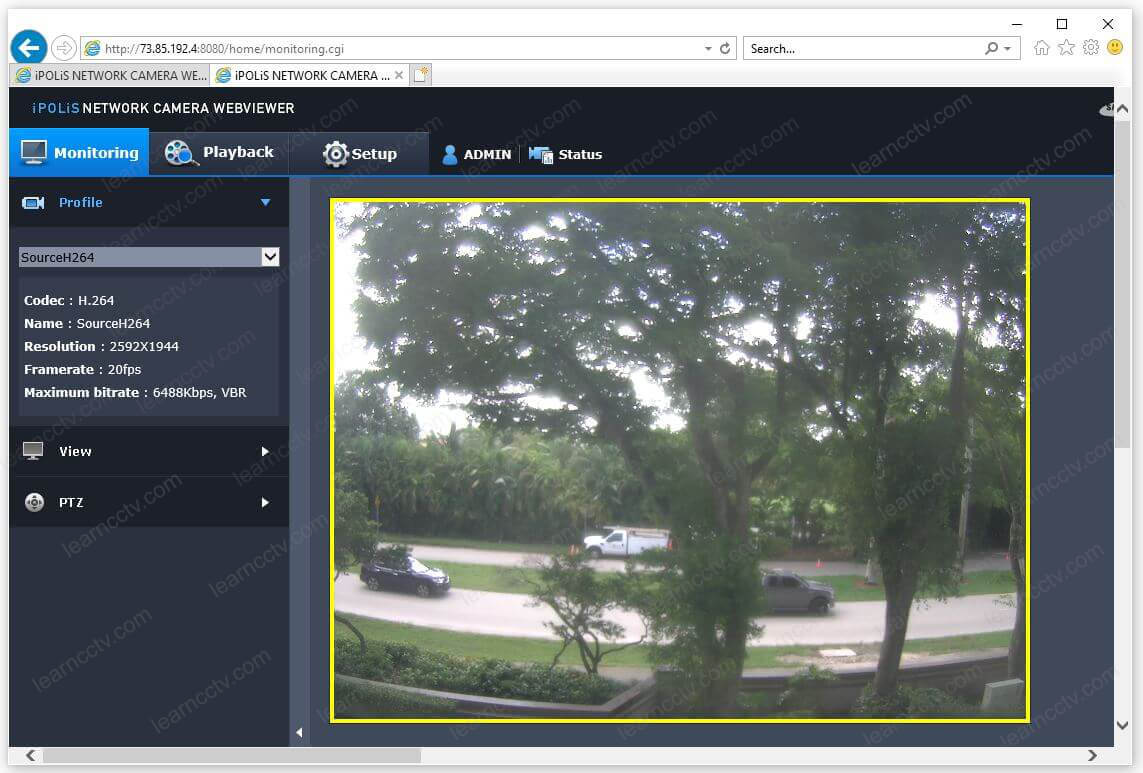
( click to enlarge )
As you can see, the browser changes the URL to the IP and port and I can have access to my camera after entering the username and password.
Now everything is OK and working fine 🙂
Extra information: Port Forwarding
If the port forwarding processing is not clear or you couldn't understand, here a video that shows another example of the process.
Conclusion
The Wisenet DDNS setup is simple, you just need to understand the principle of URL redirection and the port forwarding process.
I used my account, camera and router to make the example simple and realistic.
You can follow the example and set up yours.
Please share this information with your friends.
