Do you want to record your Axis camera to a Windows file share?
This is not a typical situation; however, I can show you the steps to get it done.
I've tested the setup myself with an Axis camera P1365 MK II I have in my lab, so rest assured you have all the information you need from the best source.
The picture below shows the result of the configuration...
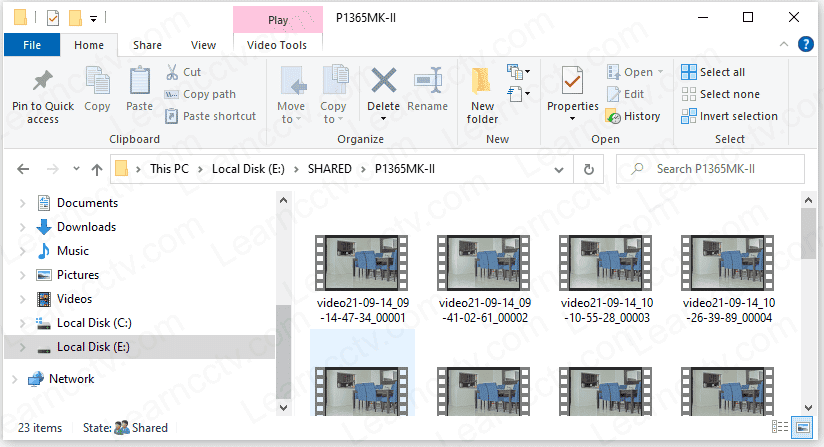
Files recorded into a shared folder
Let's dig into the details....
Network file sharing for security cameras
Before configuring the camera to record into the network, you need to make sure the topology of your network is correct, and the device can communicate.
The diagram below shows an example of a network diagram.
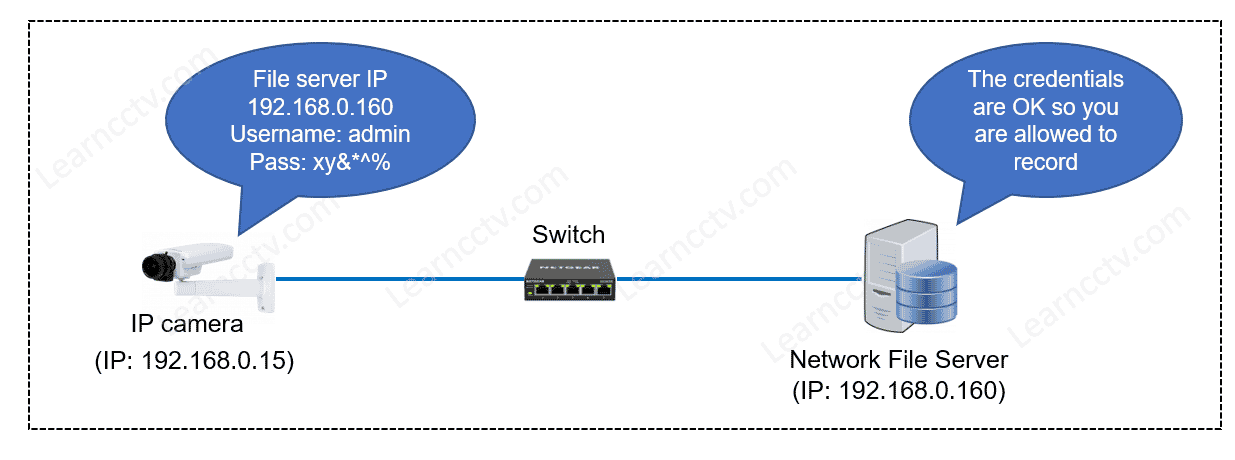
As you can see, the camera and the computer used as File Server are in the same network connected via a switch and in the same subnet range (192.168.0.x).
Make sure your IP camera can reach the file server by using the ping command to send packets via the network, as shown in the picture below.
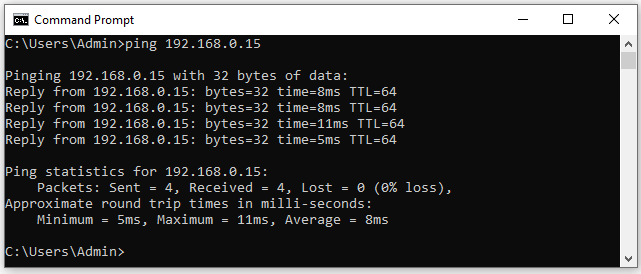
In this example, I'm sending a ping from the computer (IP 192.168.0.160) to the Axis camera (IP 192.168.015), and I can see that there's no packet loss.
How to set up the Axis camera to record to the network file share
The next step is to share the folder you want to save the files into and then configure the Axis camera to use such resource. Let's see how to accomplish that.
Here are the steps to share a folder in the Windows File Server:
- Open the Window File Explorer;
- Create a folder;
- Right-click and choose "Properties";
- Click the "Sharing Tab" and share the folder;
- Click the "Advanced Sharing..." button;
- Click on "Permissions";
- Add the user you want to have access to the folder.
The idea is to create a folder that the camera can record into.
You need to pick a Windows user and set the privileges correctly.
Share the folder in the Windows Server
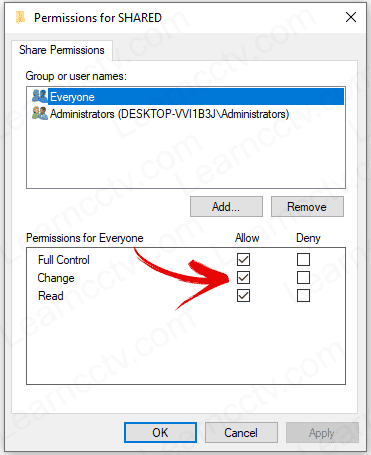
As you can see in the following pictures, I created a folder and configured it with "Full Control" to everyone, including the user "admin".
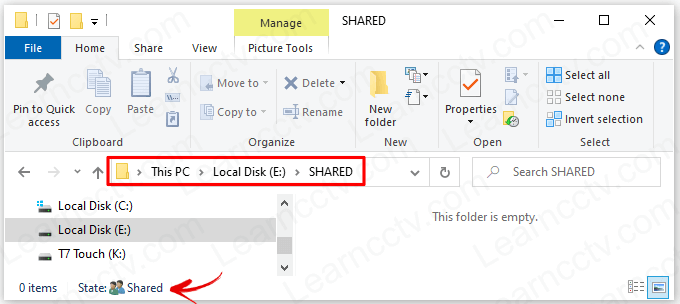
The picture shows the folder state as shared.
As long as you have it like that, the camera will be able to record to it.
To share the folder, just right-click on it and click the "Share..." button.
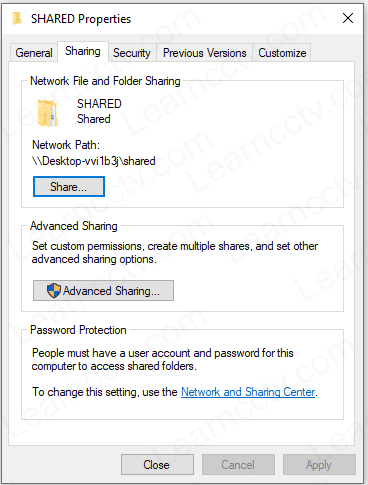
The "Advanced Sharing..." button allows you to change the folder privileges.
You either allow everyone to have full control of the folder or only a specific user.
In this example, I shared the folder, and I'm using the admin user to log in.
Make sure the Motion Detection is enabled
As the camera depends on an event to start sending files to the Windows Server, you need to ensure the motion detection App is installed and enabled.
Go to the Apps tab and check that....

Go to the Apps tab and check that....
Configure the camera events
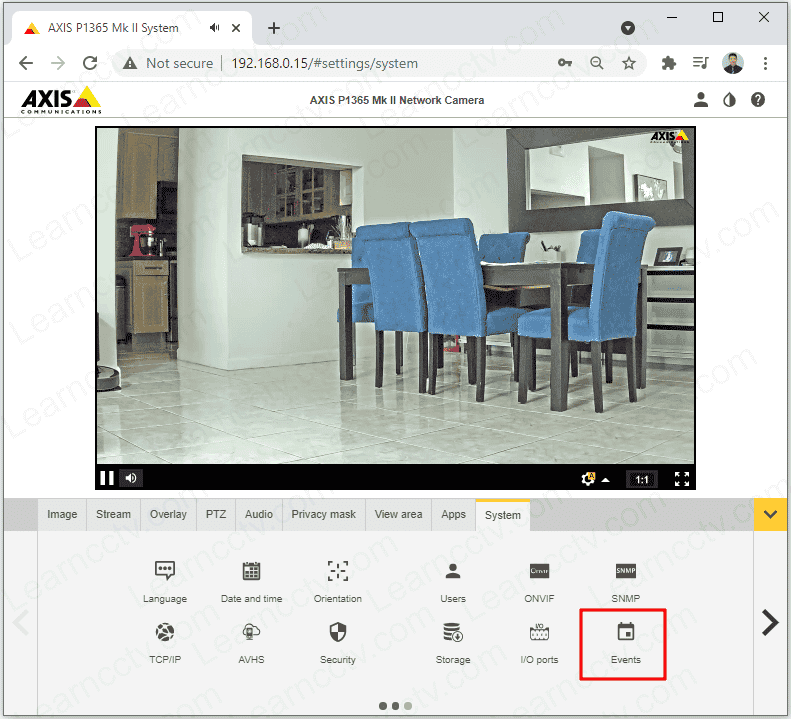
Everything is done on the System >> Events tab.
Just open the configuration menu and click the Events link to get started.
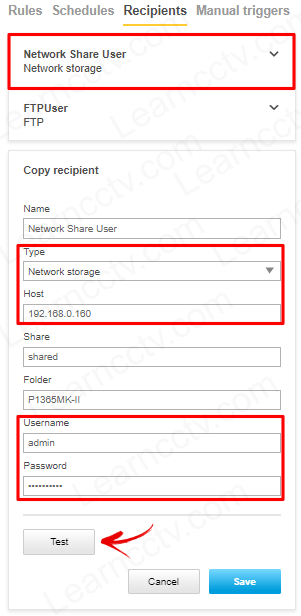
Before creating the events to trigger recording, it's necessary to add a recipient with the File Server information (IP address, username, and password).
Create a new recipient and enter all the necessary information, as shown below.
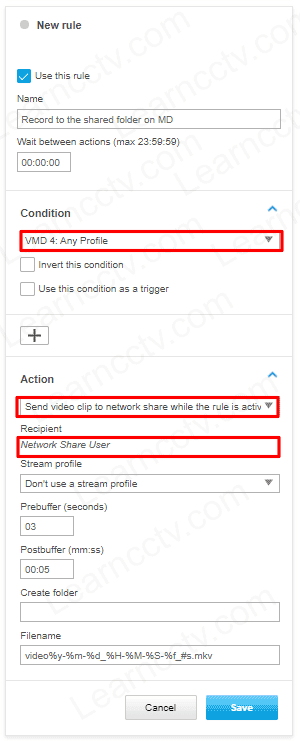
The next step is to create a rule with motion detection as a condition to trigger the event, and the action is to send video to the network share.
Note the recipient is the "Network Share User" I've created in the previous step.
And it's done.
Now you can enjoy your camera sending videos to your file server.
Video: How to record Axis camera to a file server
Here's a quick video with step-by-step instructions on how to share a folder in the file server and configure the camera to use such a resource.
Related video
Please share this information with your friends.