In this article, I talk about the Ubiquiti Nanostation Loco M2 for security cameras.
This wireless radio was designed to work with a regular link for data traffic, and the idea is to analyze if the product is good enough to work with surveillance systems.
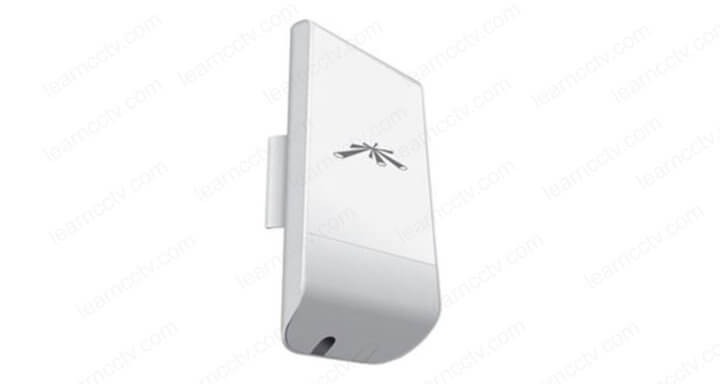
Ubiquiti is very popular among people that want to send data traffic over long distances. There are different versions of the product, and the Nanostation Loco M2 is a model that is very affordable and easy to use.
You can usually find this model on Amazon with reduced promotional prices.
I noticed that a lot of people are using the Ubiquiti NanoStation for security cameras, so I decided to give a try and check if this radio can get the job done.
Yes, a security camera converts the video into data packets, and of course, the radio can send such packets from point A to Point B. Still, my concern is more related to the radio stability while working with critical traffic from cameras 24/7.
Ubiquiti NanoStation Loco M2 for IP cameras
You can use wireless radios in surveillance systems to send the video stream from the IP camera to a recorder located on a central station, as shown in the picture.
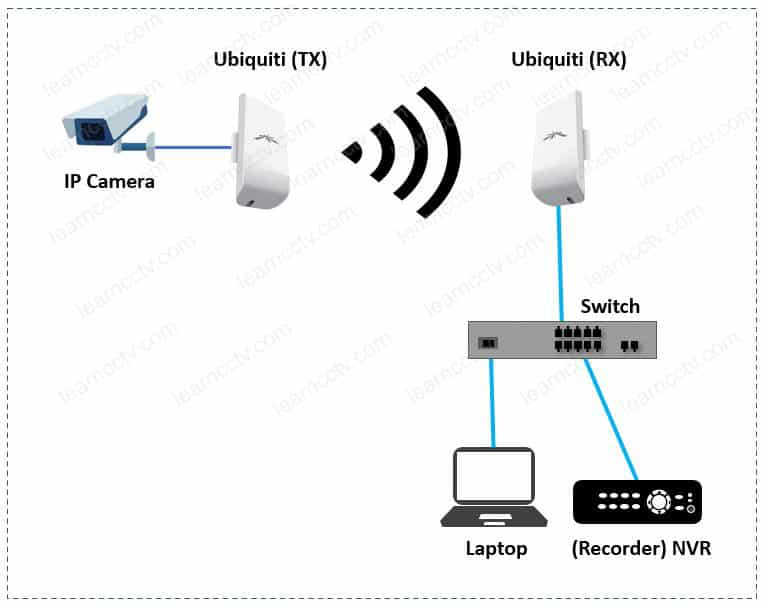
On the left side, there's an IP camera connected to a Ubiquiti Radio that is used to transmit the video to a receiver located on the other side connected to a Switch.
Devices such as laptops or an NVRs (Network Video Recorder) are connected to the switch to receive and handle the traffic coming from the IP camera.
The most common way to use the radios for such an application is to set them up in bridge mode to transmit the data between the locations transparently.
What is in the Ubiquiti NanoStation box ?
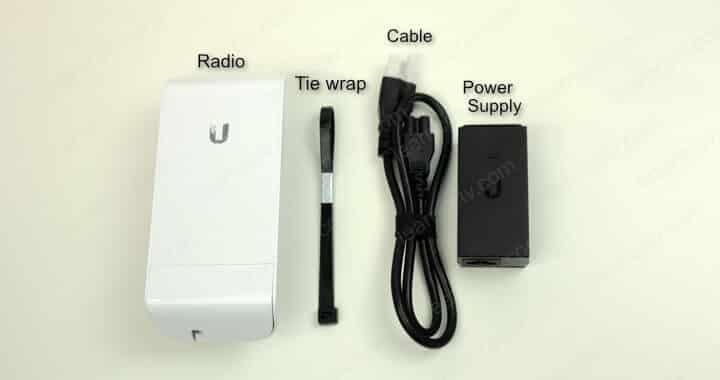
In the product's box, there's the Ubiquiti radio, a tie wrap, a power cord, and the power supply with PoE ports, as shown in the picture below.
One of the switch Ethernet ports is labeled PoE, which is used to power the radio via a UTP cable. The other port is labeled LAN, and it is used to connect to the switch where the recorder should also be connected.
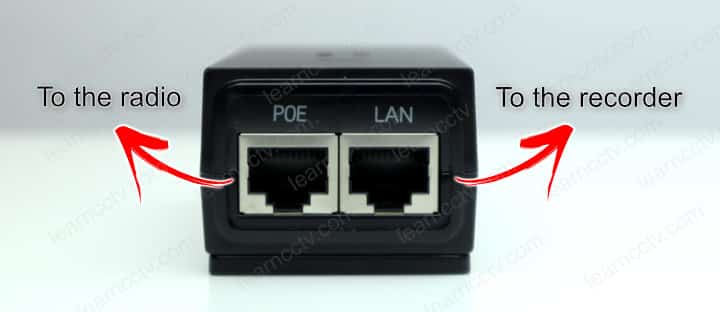
You need to buy the UTP cable yourself because they don't come in the box.
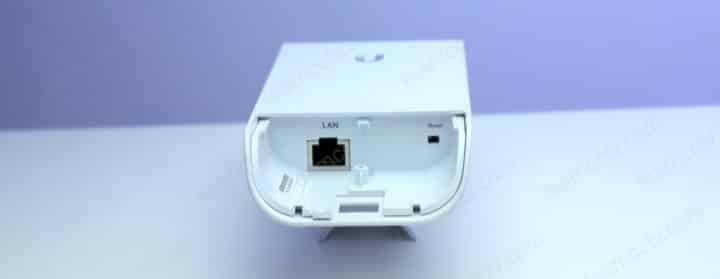
On the bottom of the radio, there's an Ethernet port and a reset button.
How to wire the Ubiquiti NanoStation
Connect a UTP cable from the Radio Ethernet port (LAN) to the power supply Ethernet port (PoE). The other Ethernet port on the radio goes to a switch.
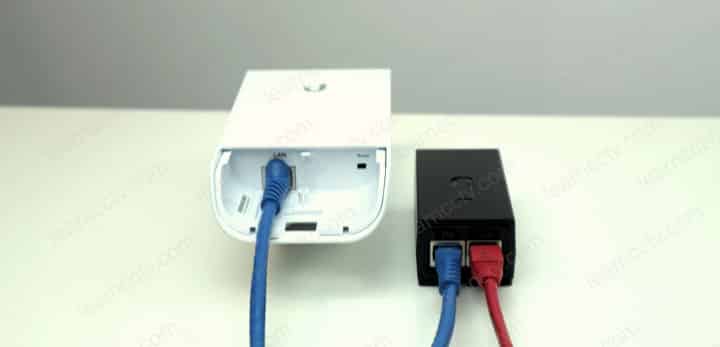
It's simple like that, and now you are ready to turn the system on.
The Ubiquiti NanoStation Setup
It's possible to access the Radio's menu via a web browser.
Connect an UTP cable from a computer/laptop to the radio (or switch the radios is connected to) and follow the steps below.
- Change the computer IP address to 192.168.2.x (x is a between 1 and 254);
- Use a web browser and type the IP address 192.168.1.20;
- Enter the username/password ubnt/ubnt;
- Change the default password;
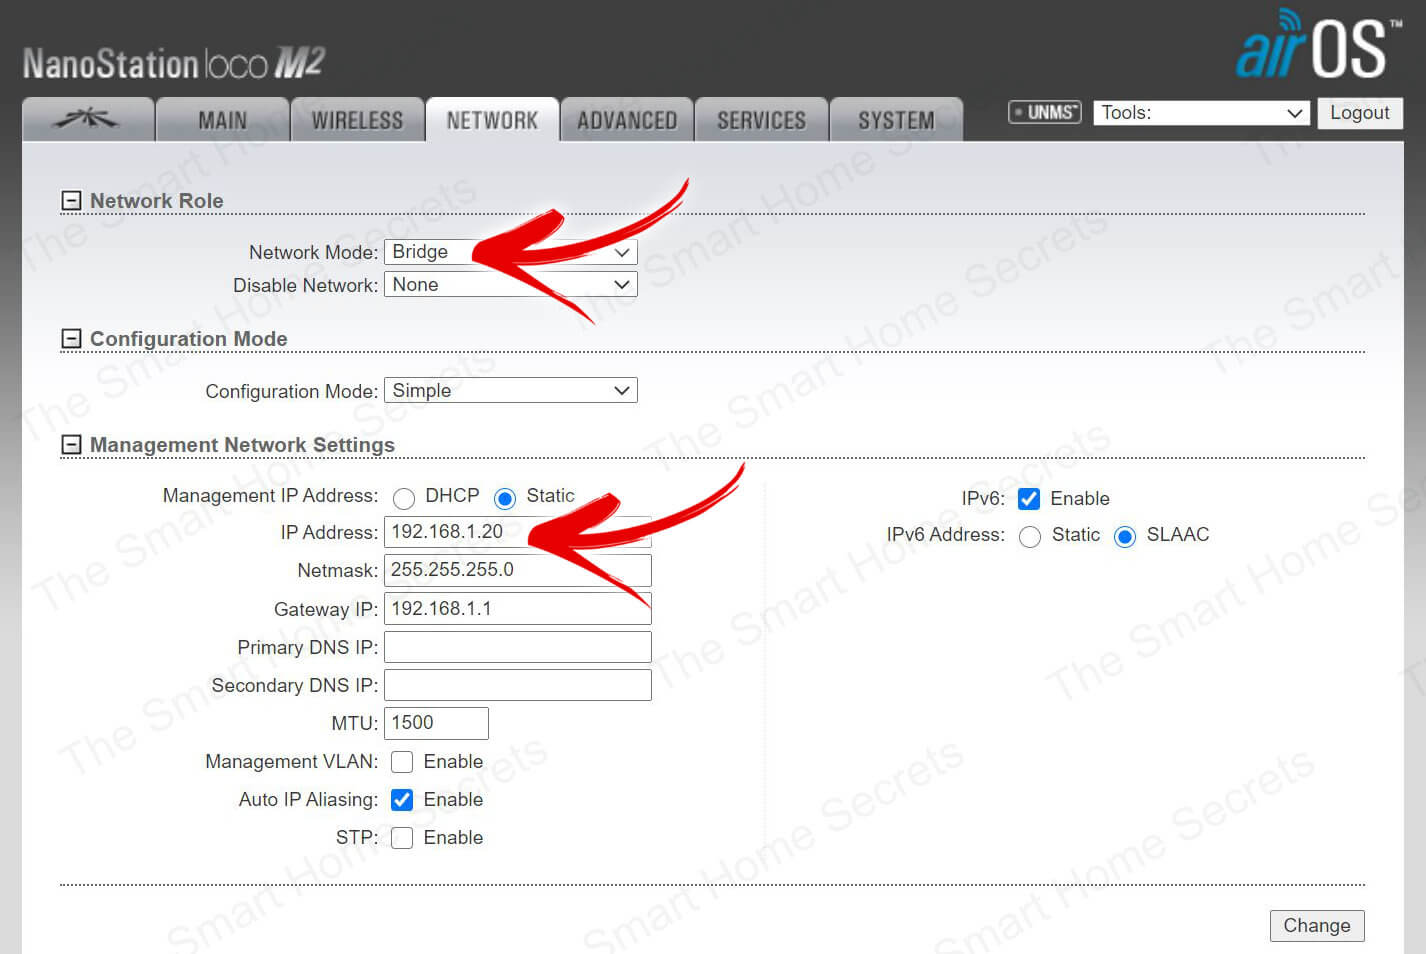
- Change the radio's IP address to meet the range you use on your network;
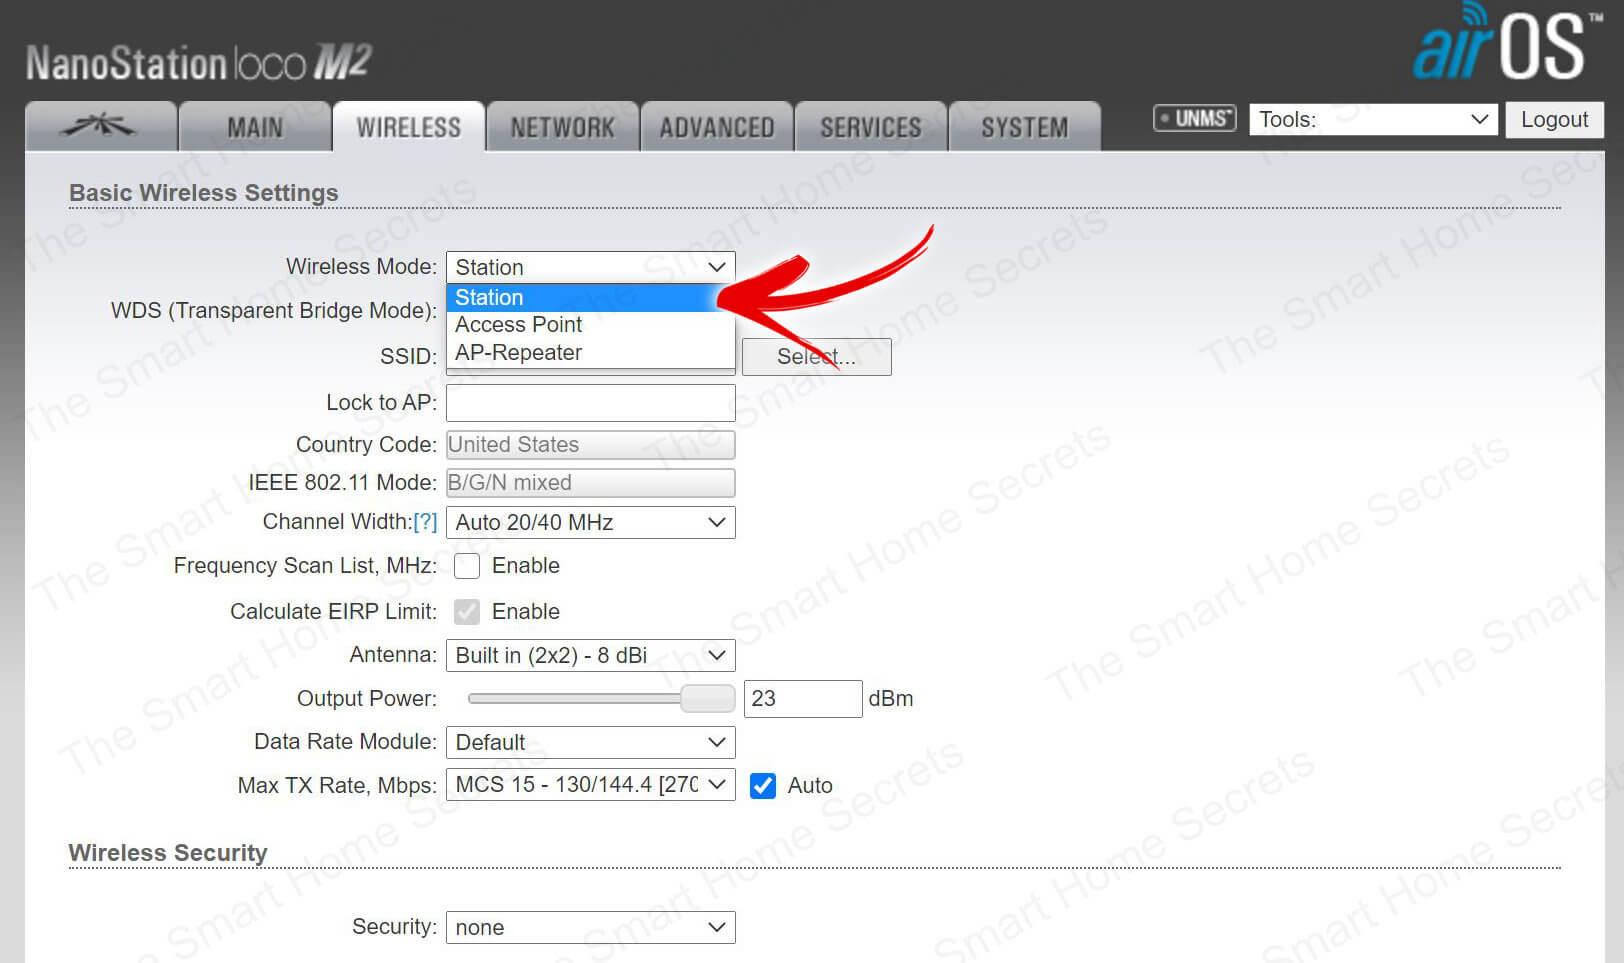
- Change the SSID, channel mode (bridge), and create a password.
The main tab show some information about the CPU and memory usage, the Network mode, the SSID, and the Wi-Fi signal strength.
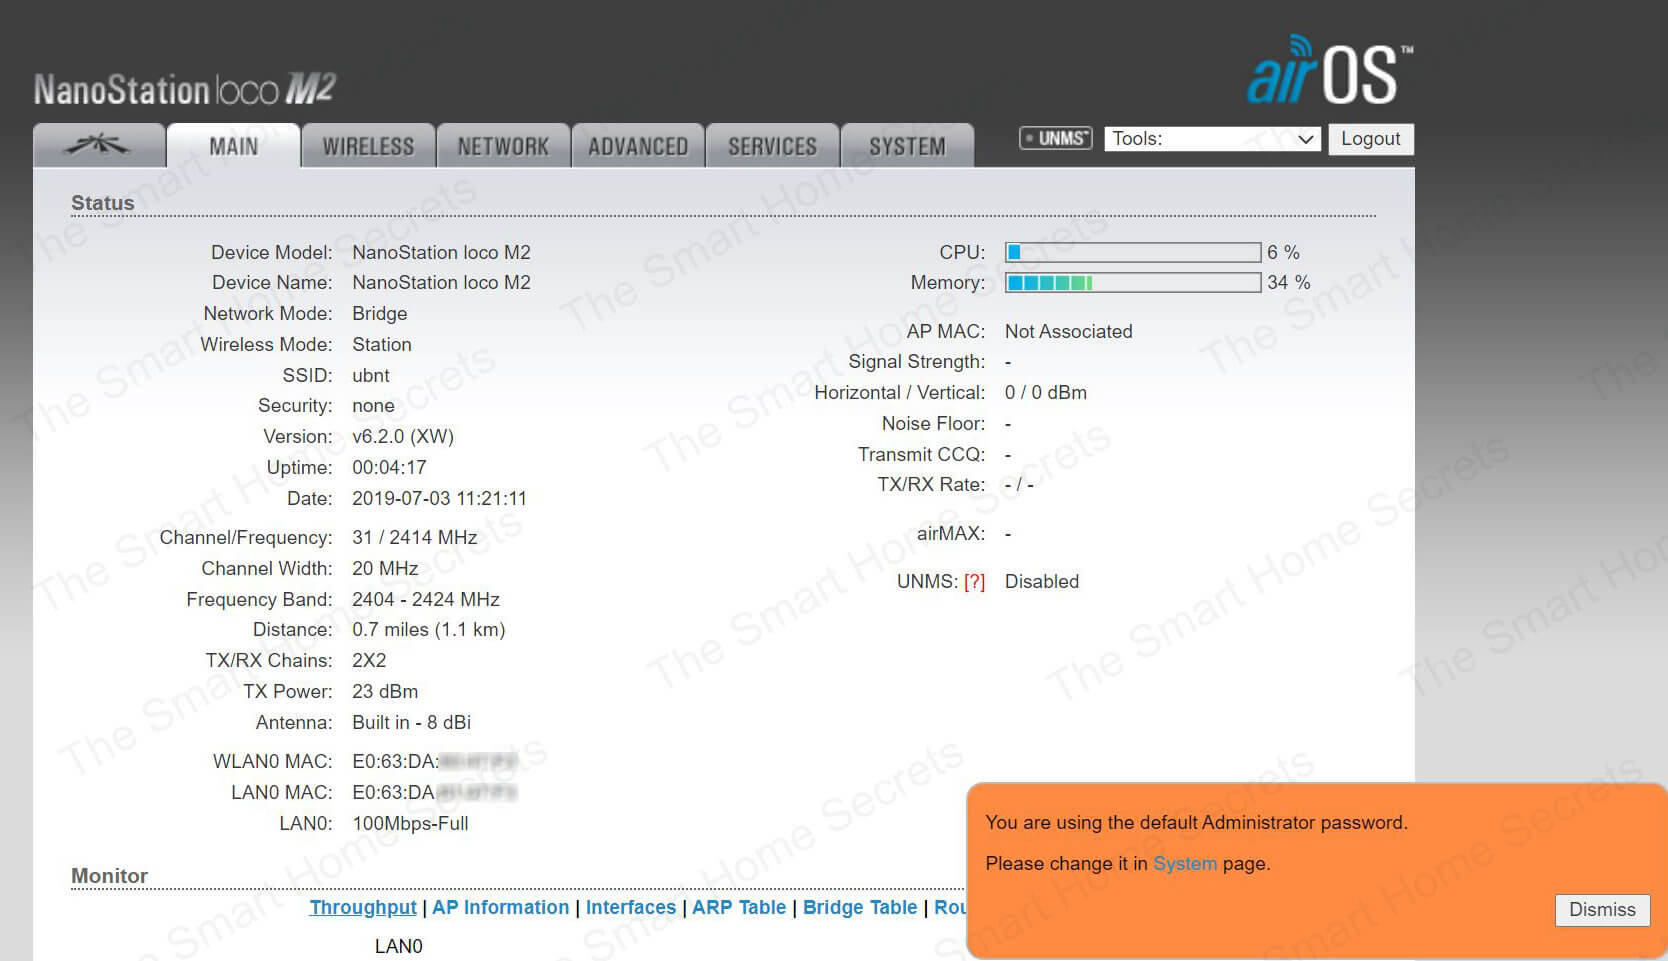
(click to enlarge)
To change these parameters, go to the Wireless and Network Tab, as shown below.
(click to enlarge)
The network tab allows you to change the Network Mode and the IP Address.
(click to enlarge)
You don't need to change other parameters now.
Keep it as simple as possible to avoid problems.
Later you can play with other configurations.
Related articles
Here's a list of related articles that can help you.
Conclusion
The Ubiquiti NanoStation Loco M2 is usually used for Internet traffic but can also be used for security cameras as long as the project is not critical.
I've tested theses radios to steam a group of IP cameras to a recorder, and everything is working fine for this specific situation.
I recommend this product for small surveillance projects.
I hope this article can help you; please share it with your friends.
