In this article, you can find the Amcrest default password and learn how to change the default IP address in the first login. The process takes less than 5 minutes.
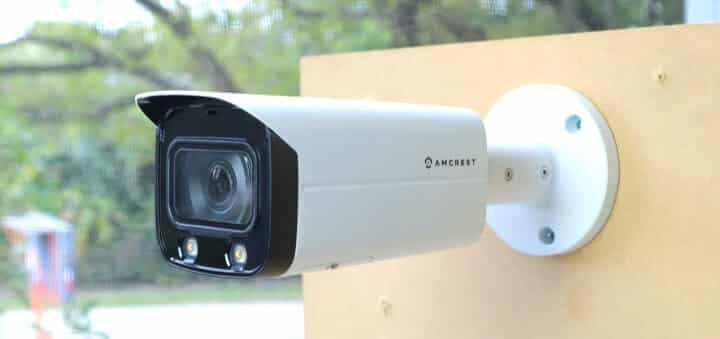
The Amcrest camera comes with a default password
If you are trying to access your Amcrest camera for the first time and have no idea how to get it working, this article can help you with a step-by-step procedure.
The Amcrest default password and IP address
Default username: admin
Default password: admin
Default IP address: 192.168.1.108
The camera used as an example in this article is the Amcrest IP4M-1046EW-AI
The information may be similar to other Amcrest models, but in any case, there's a way to get into the camera configuration using the Amcrest IP config tool.
Let's take a look at how to change the username and password for the camera.
Network Diagram
The following diagram shows the Amcrest camera connected to a PoE switch.
Note the Default IP address 192.168.1.108 that I will change to 192.168.0.105.
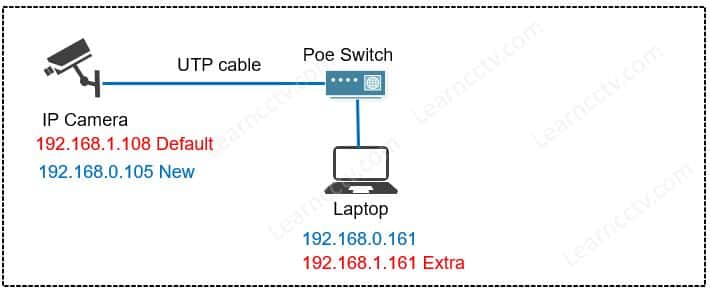
In this example, I use a switch, but it could also be a router.
I'm assuming the Amcrest camera will not automatically get an IP from a local router (I don't have one in this example). Let's work with static IPs.
The IPs in red represent the camera network range 192.168.1.x
The IPs in blue represent the laptop network range 192.168.0.x.
It's necessary to add an extra IP to the laptop (192.168.1.161), so it can access the camera via its default IP (192.168.1.108) and then change the camera IP to a new one (192.168.0.105). I hope this makes sense... Please make you understand that.
==> If you changed the password and don't remember it, please watch the video in the end of this article for more information on how to reset it.
Add an extra IP to your laptop / computer
You can add an extra IP to your laptop so you can access the Amcrest camera.
Just follow the steps below.
- Open the "Network & Internet Settings";
- Click on the Ethernet icon;
- Click on "Change adapter options";
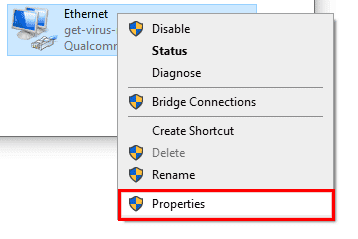
- Select "properties";
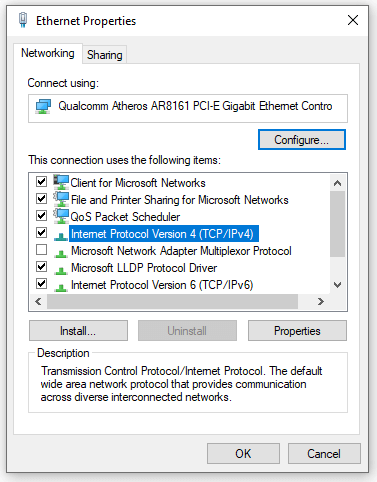
- Select "Internet Protocol Version 4";
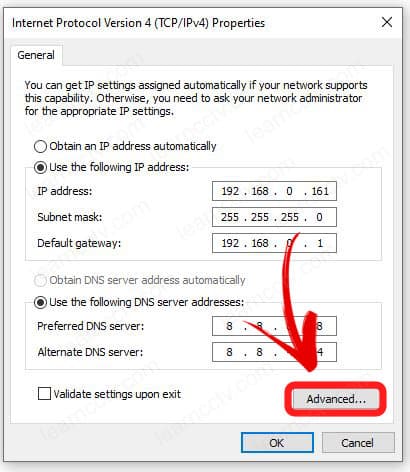
- Click on "Advanced";
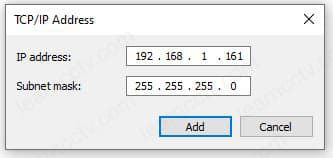
- Click on "Add";
- Add an extra IP address.
See the following picture for more details.
Right-click the network icon and click "Open Network Internet Settings".
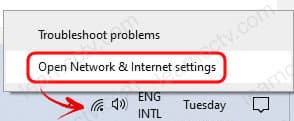
Select "Ethernet," which represents your computer's interface.

Click on "Change Adapter Options"
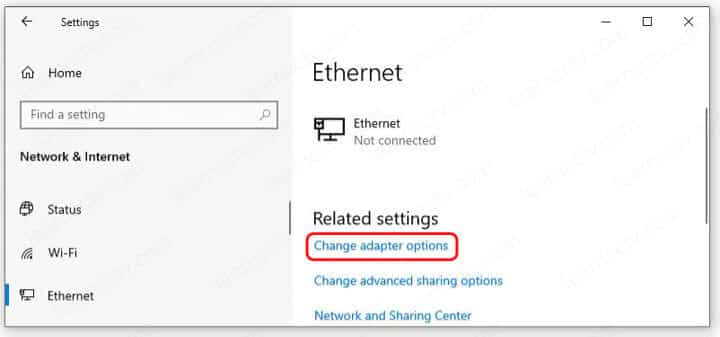
Click on "Properties"
Click on "Internet Protocol Version 4"
Click on "Advanced"
Click on "Add"

Add the IP address that is the same network range as the camera (192.168.1.x)
Use the Amcrest IP config tool
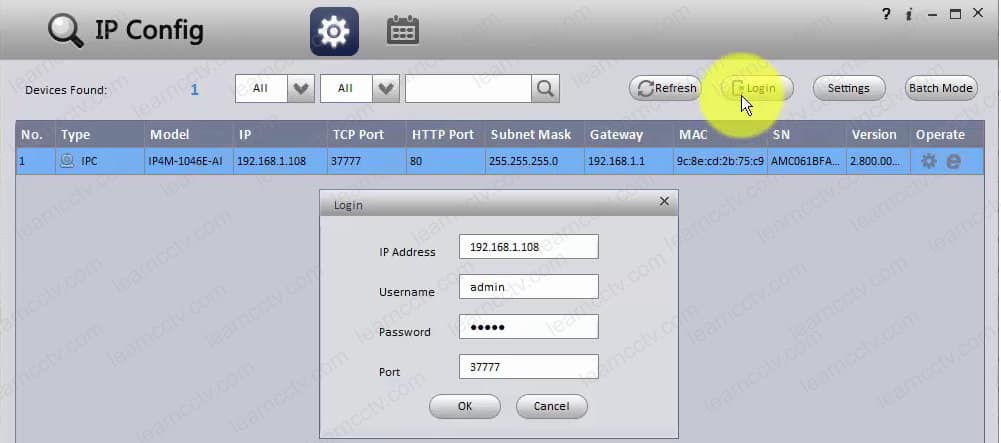
Now you can use the Amcrest IP config tool to change the camera's IP address.
Open the software and wait for it to find the IP camera.

Click on "Login"
Login with the default username and password admin/admin
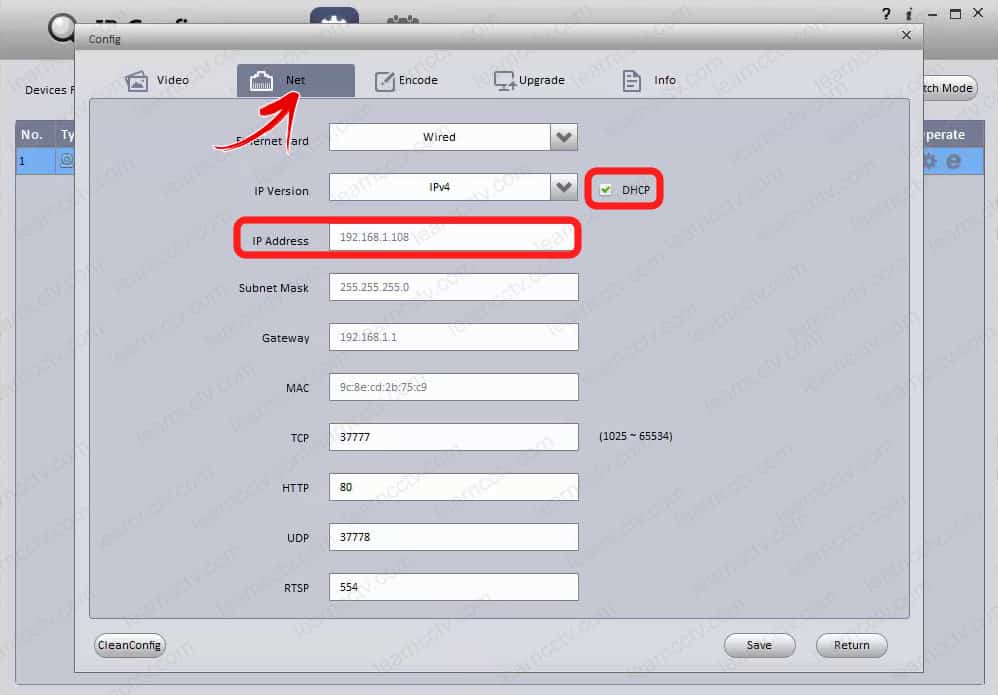
On the "NET" tab, uncheck the DHCP box.
Change the camera's IP address.
Click the "Save" button.
Open a web browser and type the camera's IP address.
Login with the default username and password admin/admin
Change the password (mandatory).
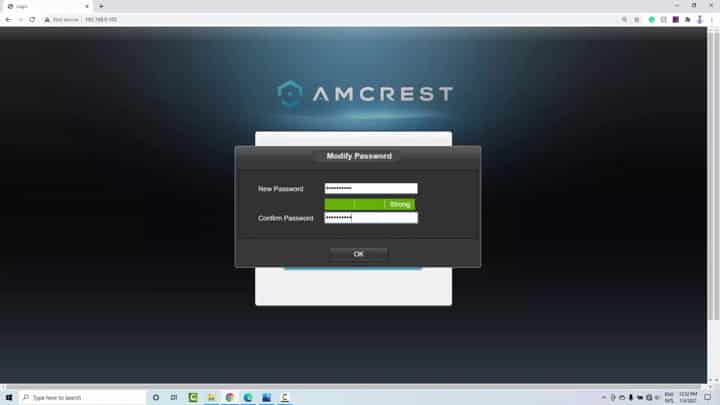
And it's done. Now you have your Amcrest camera using a new IP and password.
Video: How to reset the Amcrest camera
If you changed the default camera password but don't remember it anymore, it's necessary to reset the camera to factory default. Here's a video on how to do that.
Conclusion
Now you know how the Amcrest default password and IP addres and how to change the them if necessary, you can use this procedure for different models.
If you need extra help, please visit the Amcrest Website.