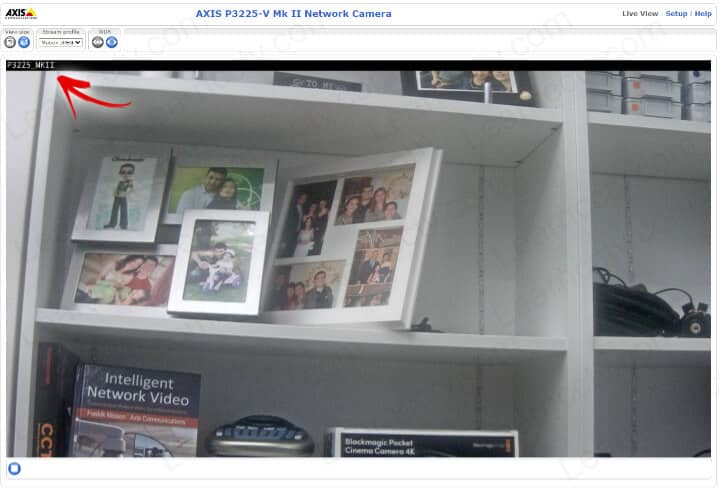
In this article, I show how to set up the security camera hostname via DHCP.
I use an Axis camera P3225 MKII and the Open DHCP server as an example.
The following picture shows the camera with the hostname displayed on the top.

The hostname information is offered to the device via DHCP option 12.
Let's see how it works...
How to set up the DHCP server
A DHCP (Dynamic Host Configuration Protocol) server sends information such as IP, Subnet Mask, DNS, and Default Gateway to a device in the network.
Yeah, that's usually the basic information a device such as a computer or IP camera needs to become a part of the network and navigate the Internet.
But the DHCP server can give much more information to the devices.
It's possible to use options for Hostname, NTP Server, and much more...
These options are configured in the DHCP server and are represented by numbers.
Here are some examples:
- Option 3: Gateway address to be assigned to the clients.
- Option 6: DNS server IP address to be assigned to the clients.
- Option 12: The hostname assigned to the clients.
- Option 33: Classful static routes a client should add into its routing table
- Option 51: The IP address lease.
- Option 53: Identifies the type of the DHCP message.
- Option 55: DHCP client request specified configuration parameters.
- Option 60: DHCP client to identify its vendor.
- Option 66: The TFTP server domain name to be assigned to the clients.
DHCP server option 12 configuration
The configuration varies according to the DHCP server you have available.
You can use a Cisco router or software running on Linux or Windows.
I'm using the Open DHCP Server running on Windows for the tests.
I can specify which IP and hostname the camera gets via its MAC Address.
Here's an example of the server configuration.
[AC:CC:8E:9B:A3:EE]
IP=192.168.0.212
HostName=P3225_MKII
This is the extra configuration that is done beyond the standard one.
It's meant to tell the DHCP server to always give the camera with a specific MAC Address the same IP address and hostname.
DHCP server option 12 test
After configuring the server with the hostname option, you can run a test.
Just connect the camera to the same network as the DHCP server and observe the logs showing the IP and hostname allocation for that device.
The following picture shows the hostname P3225_MKII allocated to the camera.
As you can see, the IP address was allocated as well based on the MAC address.
You can also use Wireshark to check the negotiation between camera and server.
The picture below shows the Host Name offer under Option 12.
This is the offer and then the client has to accept it.
The picture below shows the ACK (acknowledgment).
And then you have your camera with the IP and hostname set.
But remember that the camera must have the correct configuration to negotiate the hostname and display it as well (as seen in the first picture in this article).
Let's take a look at how to set up the camera.
How to set up the camera to get a hostname
Yeah, I'm using an Axis camera in this example.
The concept is similar for other make/models, but that option may be available or not according to the device you are using. Here, let's see how it work on Axis.
Enable the Network Volatile HostName
You must enable the "Obtain from DHCP" option in the camera.
This option is under the "plain config" menu in an Axis camera.
The location varies according to the model. Here's an example of how you can find this option for two different cameras that use an old and new menu.
For the Old menu (e.g. P3225-V MK II camera)
Go to: Setup > System Option > Advanced > Plain Config > Network.
For the New menu (e.g. P5624-E MKII camera)
Go to: Settings > System > Plain Config > Network.
For both cases, you need to look for the Network Options and ensure the option "Obtain from DHCP" is checked (as seen in the previous picture).
After checking the box, the camera is ready to get the hostname from the server.
Now you need to check if everything is working on the camera side.
How to check the camera hostname
Axis cameras allow you to add overlay text on the screen.
The camera can display information that includes its hostname.
You can use different variables to display such information.
Here's how to display the hostname in the Axis camera (e.g. P3225-V MK II)
- Open the setup menu;
- Go to Video > Video Stream > Overlay Settings;
- Mark the "Include Text" checkbox;
- Insert the #n variable in the box;
- Save the configuration.
And now you can see the hostname on the top of the screen.
As long as your setup is OK, you will be able to see the camera's hostname.
And that's all you have to do.
I hope this article can help you.
Video: How to use the DHCP option 12
Here's a video on how to use the DHCP option 12 to give the device the hostname.
Please hit the playback button