This article shows how to add a Zosi IP camera to the NVR using matching code.
If you can't see the image from your camera and want to add it to the NVR, this method can help you; It's pretty quick and straightforward.
When the message "no video" shows up on the NVR, you can fix it using this matching code setup.
The steps to add a Zosi IP camera to the NVR using matching code.
After these steps, you may see everything working.
The following pictures show the "matching code" process in detail.
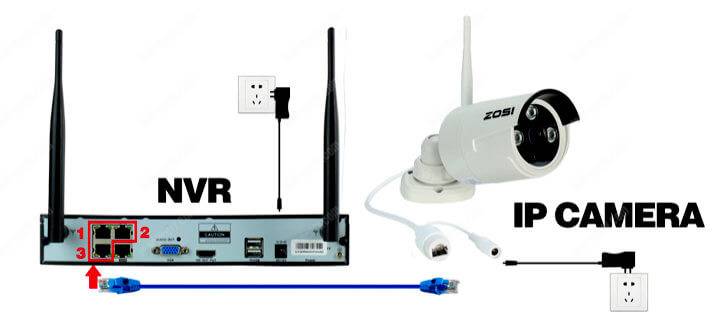
- Use a UTP cable to connect the IP camera to the NVR
Depending on the model you are using, the PoE port in the NVR sends power to the camera, so you don't need to connect a power supply to the camera.

Zosi IP camera connected to the NVR (source: Zosi website)
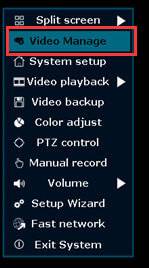
- Right-click with the mouse to bring the floating menu
The "Video Manage" menu allows you to configure the camera via matching code.

(source: Zosi website)
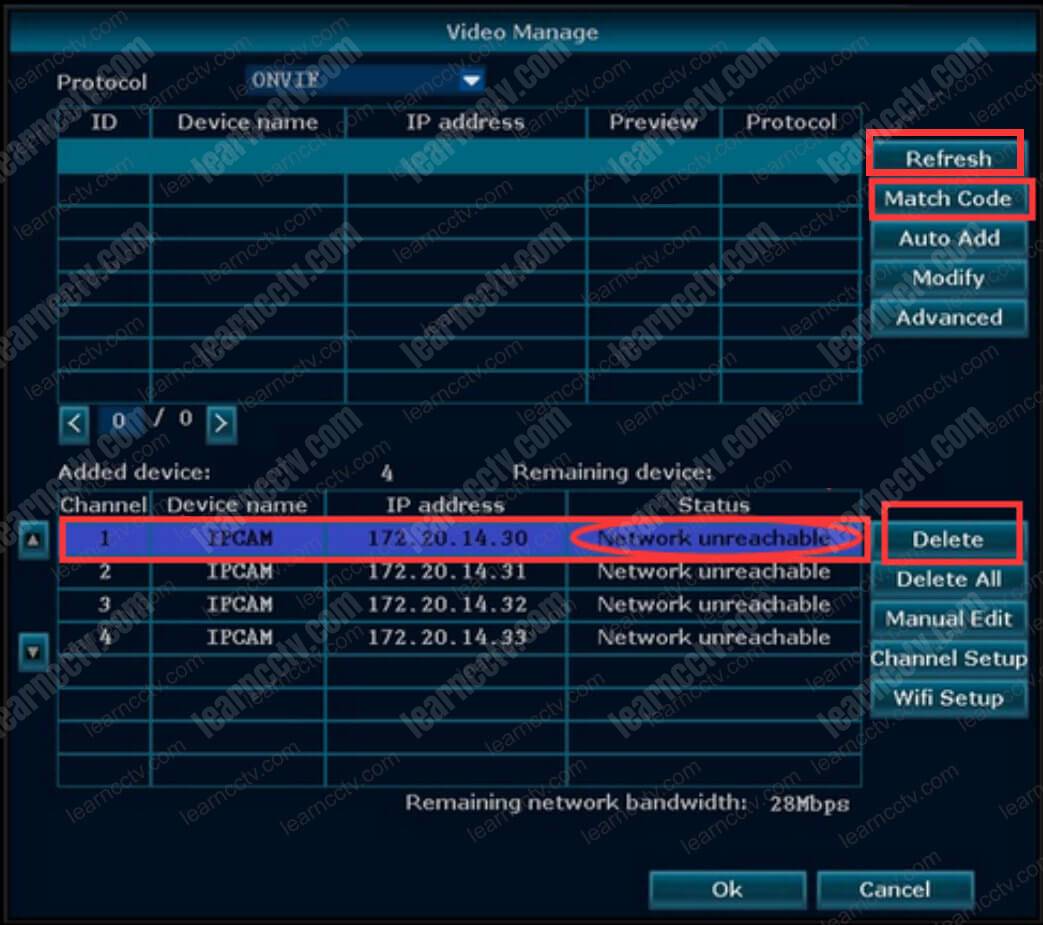
- This is Video Manage windows you may use.
Select the camera (as shown in the red rectangle) and click the "Delete" button. After that, just click the "Refresh" button and then click "Match Code".

(source: Zosi website)
- Confirm the changes you want to make
Click the "Yes" button to confirm the changes.

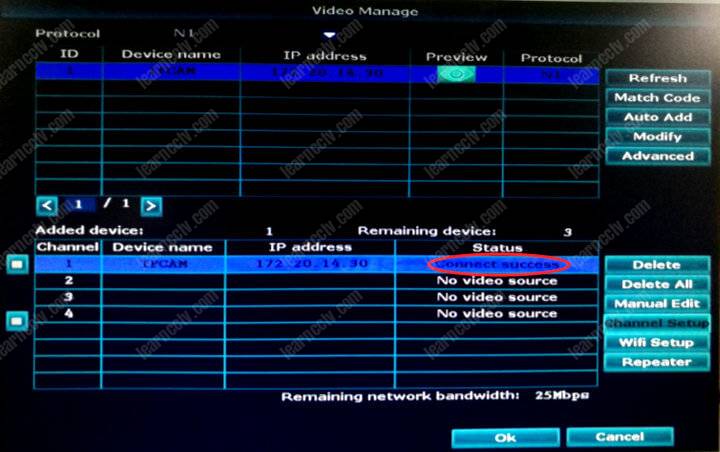
- Check the camera status
You may see the “Connect success” status for the camera.

And you are done.
It's not that complicated, is it?
I hope this article can help you.
Please share with your friends.