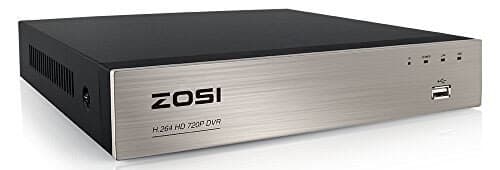
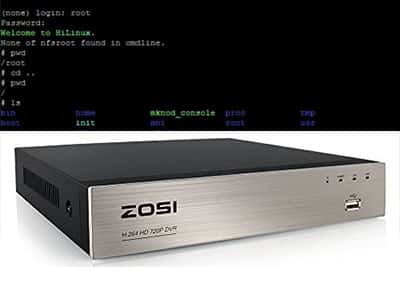
If you already tried the Zosi DVR password reset procedure using the SPD App software but the Super Password didn't work. I have another way you can try to solve the problem. It requires a little bit of work but it takes only 5 minutes.

To recover the Zozi DVR password you just need to reset it to the factory settings. Just log into the DVR using a telnet client software and delete an internal file. The user/password combination turns back to the original admin/admin.
Don't worry, in this article, you will find the step-by-step for such a procedure.
==> There's another way to reset the DVR using a mobile App. Just case the procedure presented here doesn't work for you, please read the article: Zosi DVR password reset.
The Zosi DVR model
Usually, the reset procedure using telnet works with Zosi DVRs that are labeled "H.264 DVR" or something similar. Please check if that's your case.
How the DVR reset process works
OK, a quick overview of the process....
The DVR uses the Linux operating system to execute its task (just like your computer uses Windows or MAC OS). You just need to interact with the Linux and remove the config.dat file that holds the DVR configuration.
You need a software to be able to connect to the DVR and send it the necessary command to accomplish this task. Don't worry, this is simple.
Connect ==> Send commands ==> Delete File ==> Reboot ==> Done.
Zosi DVR password reset via telnet
To reset the Zosi H.264 DVR please follow the steps:
1. Connect the DVR to the network;
2. Download and install a telnet client software;
3. Login into the DVR using the telnet client software;
4. Locate the file config.dat and delete it;
5. Reboot the DVR and login using admin/admin;
6. Create a new password for your DVR.
-> Read the next section for the step-by-step details...
Network Diagram
See the diagram below with the different options to connect your computer directly to the DVR or using a router. In any case, you need to make sure that you are using a network cable and the correct IP addresses.
Option 1: Connect the DVR directly to the computer.
Option 2: Connect the DVR to the computer using a router
Make sure the cables are connected correctly and the devices are using the correct IPs which makes them part of the same network.
In this example, the IPs are 192.168.1.1 and 192.168.1.2
Download the telnet software
Download the software Putty that is used to initiate a telnet session to the DVR. Click the link below to visit the download page.
Using the Telnet software
On Windows, just press run the Putty Telnet Software.
Enter the IP address of the DVR (192.168.1.2 in our example) and check the option telnet as shown in the picture below. Then click "Open"
The software communicates with the DVR. After entering the username and a password you can have access to the operating system to view the files in the directories and files. So you just need to remove one of them.
The picture below shows the first screen you see.
After the connection, a user and a password are requested. For this model, a password is not set for the telnet session, meaning it's blank and you need to enter the username root and hit enter. See below the command.
The system welcomes you and now you can give commands to navigate in the directories and remove the configuration file (config.dat).
The commands can tell the OS to execute specific tasks:
"pwd" (print working directory) --> shows the directory you are reading.
"cd" (change directory) --> change to a specific folder.
"ls" (list directory) --> shows the content of the directory.
"mv" (move) --> move or rename a file.
Just enter the commands below in sequence, be careful with the details just as the dots, etc. See the commands below:
# pwd <enter>
# cd.. <enter>
# pwd <enter>
# ls <enter>
You are halfway. Just continue...
# cd mnt <enter>
# ls <enter>
# cd config <enter>
# ls <enter>
And you are in the correct directory. Can you see the config.dat file ?
Instead of deleting it, just change its name, so the system can create a new one when you reboot the DVR. See the command to rename the file.
# mv config.dat config.dat.old <enter>
And it's done... Just reboot the DVR with the command below:
# reboot <enter>
Login into the DVR
Now the DVR is back to its default configuration and you can login using the credentials admin/admin. Just like a brand new one, cool huh ?
After the first login, just change the password, and make sure you don't lose it because I might not be here again to help you out 🙂
Create a new password for the DVR
It's very important to create a new password to protect your device.
Open the User Management and input a new password that is strong enough (is recommended to use a combination of letters, number, and symbols).
( Input the New Password twice)
Most common problems
Sometimes the DVR might not respond to the telnet command.
This problem could indicate that the communication between the two devices is not working properly (network connection between computer and DVR).
Make sure the cables are corrected connected and that the computer and DVR are using the correct IP address, which means you have to setup the IP in your computer to match the IP range the DVR is using.
Double check if you selected telnet and entering the correct IP in the software.
Sometimes the DVR you are using doesn't have the telnet service available and won't respond to telnet commands on port 23. Try other reset methods...
How to reset other DVR models
Due to the fact that there are many DVRs in the market, sometimes you have to try a different way to reset your device to recover from a lost password.
Please take a look at the other articles I have in the blog, they could be helpful.
See the links below on how to reset DVRs:
Call Zosi technical support
If you can't recover the password for your DVR, I suggest you call the Zosi Technical support team and they will probably be able to assist you.
You can find the support web page at https://support.zositech.com.
If you are a CCTV designer or installer
If you want to learn more about CCTV, just take a look at the Ultimate Security Camera Guide collection, just click the following links:
I hope this article was helpful for you, please share with your friends...
