In this article, I explain how to add an IP camera to a Hikvision NVR.
The process is straightforward and takes less than 5 minutes.
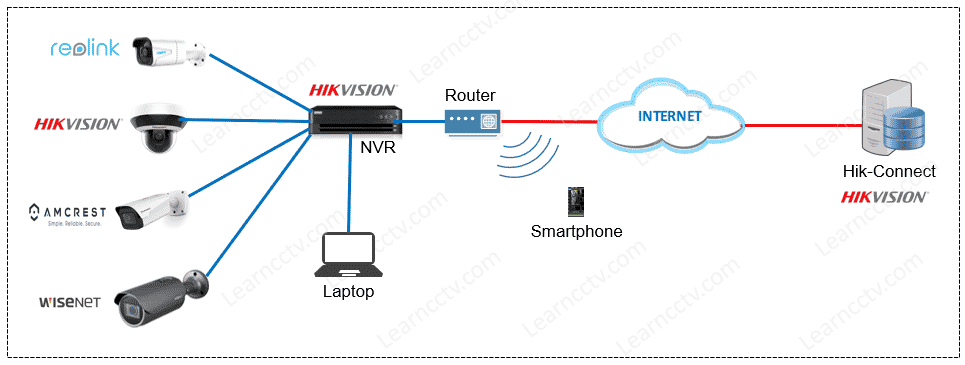
I'm assuming you have the IP cameras connected directly to a Hikvision NVR via UTP (network cable), as shown in the picture below.

As you can see, there are different camera models connected to the Hikvision NVR, but all of them can be added to the recorder if they are ONVIF compliant.
You can connect an HDMI or VGA monitor and a mouse to the NVR to control the menu that shows up on the screen; that's the easiest way to do the first setup.
Let's take a look at the set up process...
How to add an IP camera to a Hikvsion NVR
To add an IP camera to a Hikvision NVR, you need to make sure which protocol you will use, which means Hikvision or ONVIF protocol.
As long as the IP cameras have their IPs in the same subnetwork range, the NVR can find them; you just need to open the "Add IP Camera" menu and select the camera you want to add and then chose the protocol and insert the credentials.
The picture below shows the first IP camera using the Hikvision protocol because it's a Hikvision Mini PTZ camera. The other cameras have different brands and are not directly compatible with the NVR, so they use the ONVIF protocol.
Hikvision - Camera IP and protocol (click to enlarge)
Click the IP camera you want to add to the NVR, choose the "Adding Method" (Manual/Plug-and-Play), make sure the IP address is correct and then enter the username and password as shown in the picture below.
As you can see below, the Hikvision IP camera was added to the NVR.
The icons on the screen indicate the motion detection is enabled for this camera, and it's recording the video into the NVR. Still, you can't just assume that it is correctly configured in your first installation.
Next, let's take a look at how to configure the camera's motion detection and recording parameters...
Enable motion detection in the Hikivsion NVR
It's necessary to enable motion detection in the NVR so it can record the footage based on events that happen in front of the camera.
The process is pretty simple, use the mouse, right-click the screen and click on the "Menu" button to open the Main Menu.
Now, click on the "Motion" menu and adjust the parameter for motion detection.
It's necessary to select the area for the motion detection and adjust the sensitivity.
Now you have the NVR ready to detect motion when somebody (or something) moves in front of the camera, that's cool, huh?
You still need to set up the recording schedule; let's see how that works.
Set up the recording schedule in the Hikvision NVR
It's essential to record the footage according to the schedule that makes sense for our application type. You can set up weekdays, weekends, and holidays.
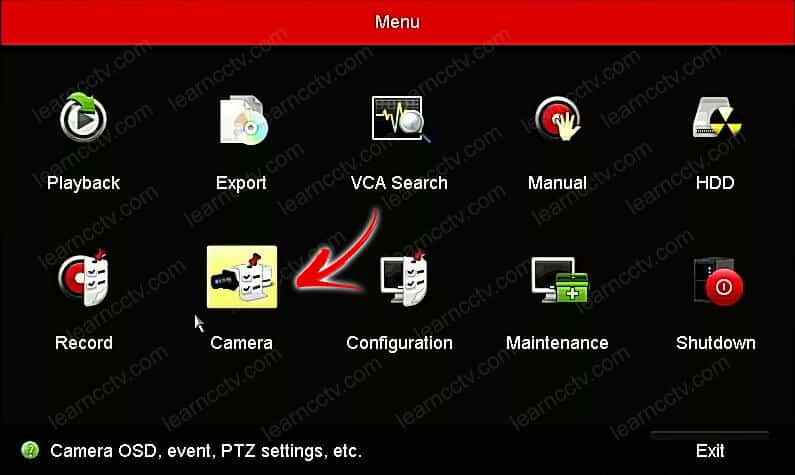
To adjust the recording schedule, click the "Record" icon in the main menu.
In the schedule recording menu, select the days and hours you want to record the footage based on continuous recording or events and alarms.
You can select different days and recording method for each one of the cameras.
The picture below shows an example of event recording from Monday to Friday and continuous recording on Sundays. (just a random example).
The next step is to adjust the quality you want to record the footage.
Click on "Parameter" and select the resolution, bitrate, video quality, and frame rate you want for each of the cameras, as shown in the picture below.
And it's done.
You have your IP cameras connected to the NVR recording the footage.
Don't forget to adjust the date and time of the NVR (this is essential).
Video: How to add Hikvision camera to a NVR
Here's a video to help you to understand the process of Adding a Hikvision camera to a NVR.
I hope it can help you.
Related articles
Here are some related articles that may help you.
