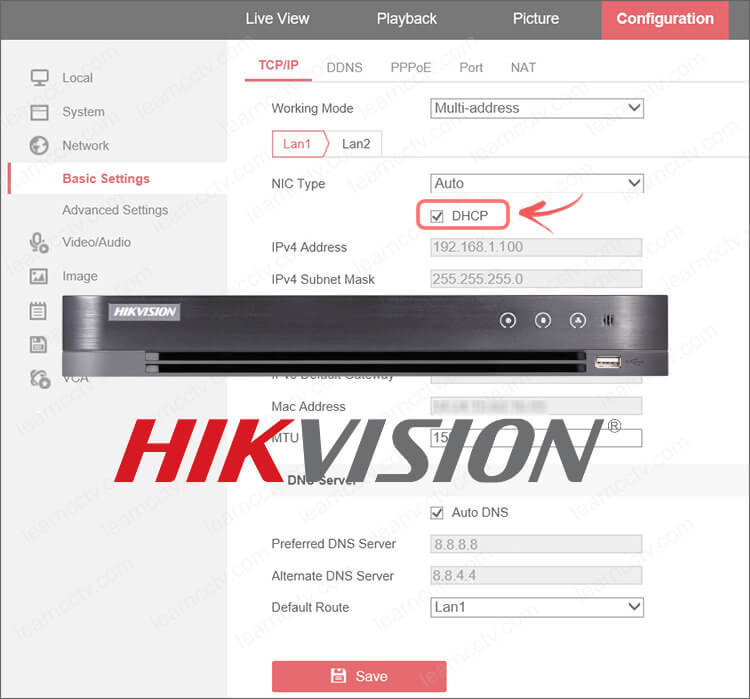
Every device that connects to a network needs to have an IP address and surveillance devices are not different, so in this article, I show how to enable DHCP on Hikvision DVRs to get an IP address automatically.

Don't forget that it is important to have your local router ready to work with the DHCP service, otherwise, there's no way the DVR can get an IP.
Let's dive into the details...
What's DHCP?
DHCP stands for Dynamic Host Configuration Protocol which was created to facilitate the way network devices can have an IP.
A server or a router is in charge of distributing the IPs to the devices in a local network as soon as they are connected and ask for such information.
When you enable the DHCP on a Hikvision DVR, it will send a broadcast message to the network asking for the IP it can use to become part of the network and have access to the Internet. See the representation below.
The router has a range of IPs that can be given to the devices in the local network, so log it to yours and check if the DHCP feature is enabled.
The picture shows an example of a Netgear C6300 router with DHCP enabled.
Every router has a different menu, but usually, you can find the menu for DHCP configuration in the "LAN Setup", just look for it your router.
How to enable the DHCP on the DVR
You can use the monitor and mouse to have access to the DVR's interface or log in via a web browser for such a configuration. Here's how to do it directly in the DVR.
Using the Hikvision DVR's interface
To enable the DHCP on a Hikvision router follow these steps:
- Right-click to open the main menu
- Click the "Configuration" menu
- On the network menu click "Enable DHCP"
See the pictures below for more details
And that's all. Just click the "Apply"button and it's done.
Now, let's see how to do it via a web browser.
Using the web browser
Here are the steps to enable the DHCP using a web browser.
- Open a web browser (I.E.)
- Log in to the DVR
- Open the network menu
- Enable the DHCP service
Click "Save" and test the DVR to see if it's working.
After this step you can see what IP the DVR got from the router and set it statically to guarantee you always know what it's the IP it's using (my recommendation).
Hikvision can't enable DHCP
If you can't enable the DHCP in your Hikvision DVR or NVR because the option is greyd-out just check the Netowork Menu and disable the "PPPoE" option.
Related articles
Here are some related articles that can help you.
Conclusion
Now you know how to enable DHCP on Hikvision DVRs and you can use this knowledge to configure other devices such as NVRs and IP cameras.
The principle is the same for any device that needs an IP to connect to a network and have access to the Internet, so make sure you understand the concept.
For extra information, visit the Hikvision website.
Please share this article with your friends.
