In this article, I show to enable auto tracking in a Hikvision camera.
I'm talking specifically about the VCA (Video Content Analytics) auto tracking that is already embedded in the PTZ camera itself.
The process is straightforward, and you can use a web browser for the setup.
How to enable the auto tracking in the Hikvision PTZ
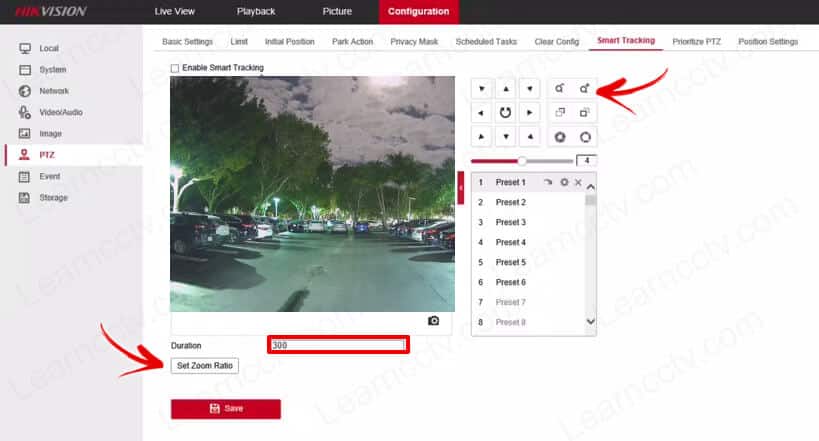
Remember that we are going to enable the VCA auto tracking.
Do NOT click the button "Enable Smart Tracking".
That is a common mistake for this type of configuration and can lead your camera to behave strangely and chase any movement it "sees" on the screen. Please don't.
Enable the PTZ auto tracking
Here's how to enable the Auto tracking on Hikvision PTZ the correct way:
And that's it. The auto tracking is enabled.

Now you need to move to the next step and enable the analytics.
Let's see how to do that...
Set up the camera analytics
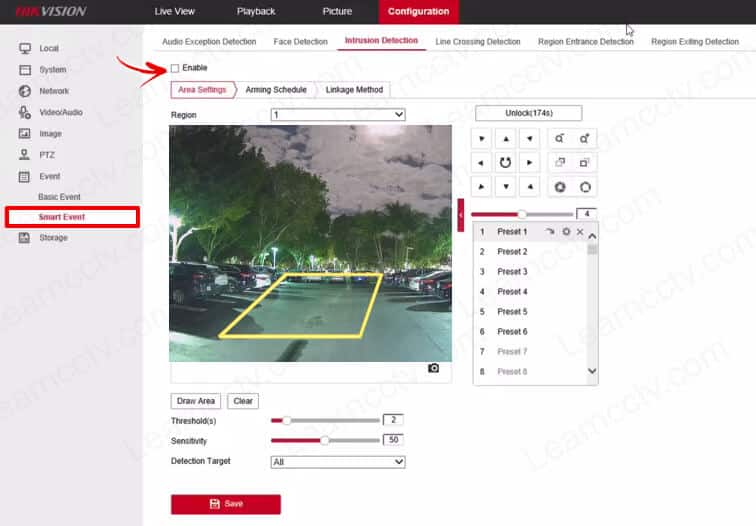
Now you can set up the analytics on the camera and draw an area so the camera can use it for the auto tracking feature.
Here are the steps:
So here you are basically choosing the area the camera is monitoring for intrusion, selecting the type of target, and adjusting the sensitivity.
We are good to go to the next configuration...
Choose a schedule
Now it's time to choose when the camera is going to work with the auto tracking. You can create a schedule to have it working 24/7 or whenever you want.
And now to the final step....
Enable the smart tracking
In the "Smart event" tab, you can enable smart tracking.
Just click "enable" at the top and mark the option "Smart Tracking".
Click on the local tab and enable the rules so you can see the overlay on the screen.
And it's done.
Now you can go outside and test your camera.
Just walk around ( or ask somebody else to do it) and have fun.
You can make adjustments to your configuration as necessary.
