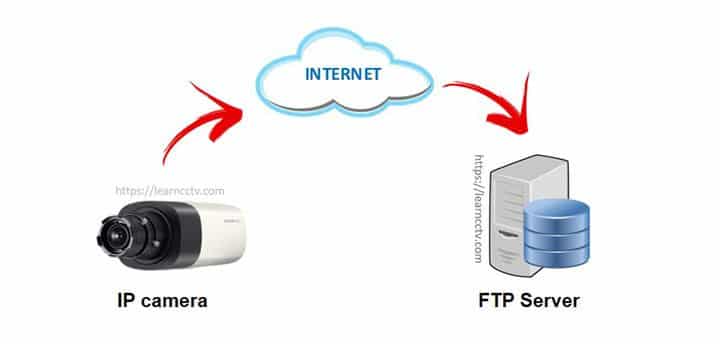
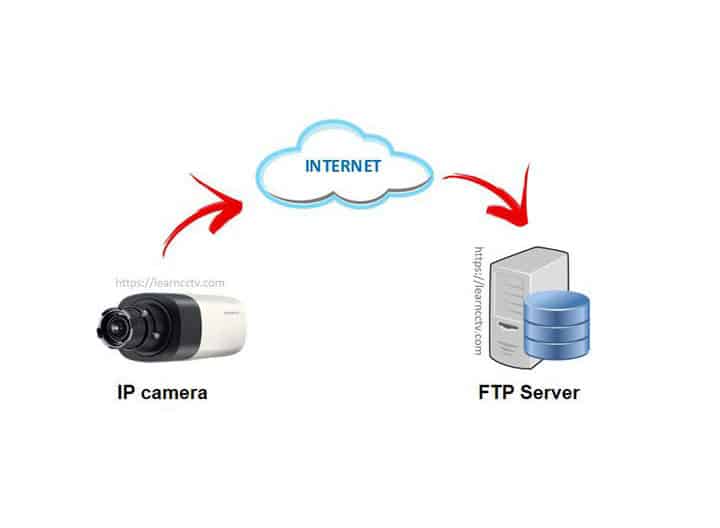
Let's set up an FTP server for IP camera. You can use a trial version to test it out!

In this article, I show how to configure a security camera to send files to an FTP server on the Internet. The process is very simple and takes less than 5 minutes.
You can see the configuration for a Samsung SNB-8000 but it doesn't matter which model you have, the principle is the same for every IP camera.
Please just pay attention to the details and you will understand how it works.
For this example, I will use the trial version of the cameraFTP platform.
Let's start with a quick explanation of how everything works.
How the FTP server for IP camera works
The first thing you need to understand is that no matter what camera model you are using it's necessary to create an FTP account and set up the camera to use it.
The idea is very simple, the IP camera must use the credentials (username and password ) to log in to the FTP server and send the files when there's an event.
So you need to configure your IP camera to work with the events such as motion detection, audio detection, video analytics, or alarms.
Once an event is detected the camera sends the picture to the FTP server.
If you don't have an IP camera yet, I recommend the Hikvision DS-2CD2142FWD.
How to set up a Freee FTP server for IP cameras
In this example, I'm using the CameraFTP platform.
Here's the step-by-step process to set up a Free FTP server.
1. Create a Free FTP account
Visit the CameraFTP website and create your trial account.
Just fill all the information, type the captcha code and you're done.
You should see a message that informs your account was created.
Choose a username that is simple to type because it will be used on your IP camera configuration later. The system will let you know it the username is available.
2. Add a camera to the Free FTP Server
Now it's time to add your IP camera to the server.
Just click the "Add" button.
Enter the camera information and use a name that is simple to remember.
Make sure you see the message that indicates the camera was created.
The next step is to get the information to set up your IP camera.
Just follow the next steps...
3 Get the information to set up the camera
Click the button "Configure Cameras"
The platform shows you the information you will need to set up your camera.
As you can see, there's the information for the FTP host which is the FTP server address, the port number, the mode (Passive) and the directory.
You are going to enter this information in your camera (more in that later).
The username and password are also created automatically by the platform.
Now it's just a question of entering the information on your IP camera to allow it to connect to the FTP server and send the images. Let's do that now...
4. Set up the IP camera to connect to the FTP server
Open the event menu on your IP camera and look for the FTP configuration.
The location of this menu varies depending on the camera model.
The picture below shows the menu on the Samsung SNB-8000 camera.
Here I can enter all the information I got previously such as the server address, the username (ID), password, Upload directory, Port, and Mode (passive).
In the "Upload directory", I have to use the camera name I created in the previous steps, which in this case is "samsung".
Make sure you enter all the information correctly into your camera.
Depending on the model you have it will test the connection and let you know if everything is OK. Just check the message before proceed to the next step.
5. Enable the IP camera events and the FTP service
You need to enable the events so the IP camera can send the pictures to the FTP server every time there's a motion or audio detection.
Go the event setup menu look for such events and enable them.
You also need to enable the FTP service, so just look for it on the event menu or any other location it might show up on your camera.
Now you have your IP camera ready to detect events and send the pictures to an FTP server. The next step is to make sure everything is working correctly.
6. Check if everything is working correctly
Check if your IP camera motion detection is working properly and if the files are being sent to the FTP server.
For the camera that I'm using a yellow square is display around the image to show that the motion detection is working. Check how that works on your camera.
In the FTP server, everything is OK and the files are being saved.
And it's done. Everything is working fine. Pretty cool, huh?
As you can see this is not hard, it's the same principle for every IP camera.
The CameraFTP server
You can use the trial version of the CameraFTP server and upgrade later if you like the platform. The price is very affordable for such a great service.
After the initial setup, you will be able to see all the files stored in the FTP server.
All the files are pictures that you can open using an editing software.
Conclusion
An FTP server for IP camera is very useful to keep all your data safe and the interesting part is that it works with any camera that supports FTP without any router or port forwarding configuration.
I hope this article can help you. Please share it with your friends.
Want to learn more ?
If you want to become a professional CCTV installer or designer, take a look at the material available in the blog. Just click the links below:
Please share this information with your friends...
