Want to learn how to view your Axis cameras on a Roku TV?
Yeah, it's possible to do that. I did it myself, and I can show you the step-by-step.
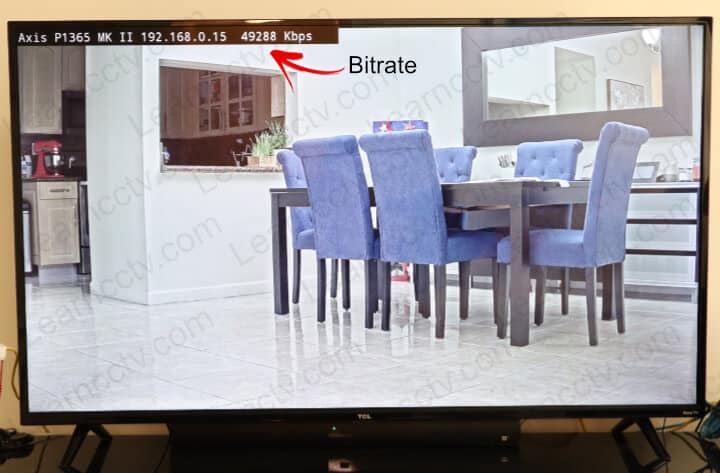
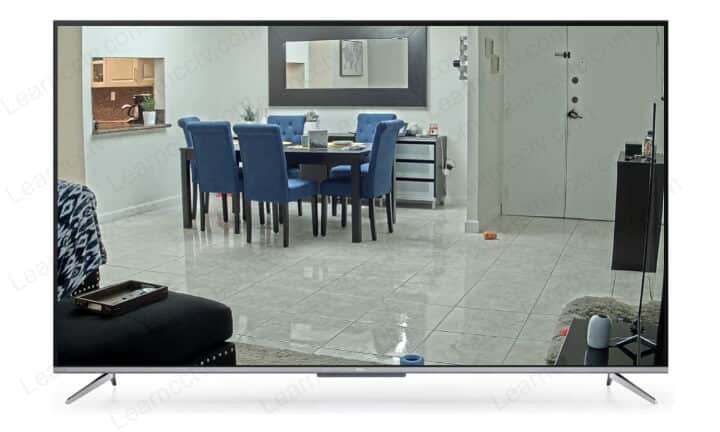
The picture below shows an Axis P1365 MK II on a TCL Roku TV.

Axis P1365 MK II camera on a TCL Roku TV
As you can see, I got my security camera working on my Roku TV.
The process is straightforward, and you can use free software.
The software is the IP Camera Viewer App. Let's talk about it.
Free software to watch IP camera on Roku TV
You can use the IP Camera Viewer to view the Axis camera on a Roku TV.
Make sure you get the correct version developed by Ioan Ghip.
Pay attention to the icon used for this software (take a look at the picture).
It's possible to use a free version for a single camera.
The Pro version allows you to display multiple cameras on the TV and has interesting features like a screen saver while the Roku is idle.
Are you ready to make it work? Let's do this.
Install the software on the Roku TV
Use the Roku search menu and look for IP Camera Viewer.
Click to add the App as a channel.
It's that easy. The next step is to add the Axis camera to the app.
Ways to get the Axis camera working on Roku
OK, now that you have the App running on your Roku TV, you need to pick a method to add your IP camera. I tested two of them. See the options below.
Options to add an Axis camera to the Roku TV.
- Without using the ONVIF protocol
- Using the ONVIF protocol
There are pros and cons to both methods.
For the first method, it's unnecessary to enable the ONVIF protocol, and the motion in the screen is smooth; however, it uses more bandwidth in your network.
The second method uses less bandwidth in the network; however, you can notice a "robotic" motion in the video because the TV can't keep up with a high frame rate. It also can't update the overlay information on the screen (more on that later).
==> To learn more, read the article: What is ONVIF Protocol.
Let's take a look at how to use both methods.
Method 01 - Without using the ONVIF protocol
Make sure your camera is connected to the same network as your Roku TV and get the following information:
- Camera IP address;
- Camera Port Number (default 80);
- Username (default root);
- Password
The diagram below shows an example of the IP camera and TV in the network.
Now that you have all the necessary information, turn on your Roku TV, open the IP Camera Viewer, and follow the instructions below.
- Click the "Add New Camera" button
- Enter the camera Name, Description, IP, Port
- Enter the username and password
- Click the "Scan" button
- Click the "Test camera config" button
- Click the "Save" button
And it's done.
Now you have your Axis camera running on your Roku TV.
As you can see in the picture below, the camera streams the video to the TV but uses 4,9288 Kbps (around 5Mbps), which is considered a little bit high.
( To see the information on the top of the screen enable the Axis camera overlay)
As you can see, the process is very simple and easy to implement.
You can also other models and follow the same setup. It may work as long as you have the correct camera information and use the valid Stream URL.
Now, let's see how to add the camera using the ONVIF protocol.
Method 02 - Using the ONVIF protocol
Make sure your IP camera and TV are connected to the same network.
Get the following information before getting started.
- Camera IP address;
- Camera Port Number (default 80);
- ONVIF Username;
- Password
To use this method, you must enable the ONVIF protocol and create a user in the camera. It's a different user, not the one used to login into the camera.
There's an article in this blog on how to enable ONVIF on Axis cameras; please read it before continuing with the setup.
Follow the steps below to add the Axis camera on the TV via ONVIF.
- Click the "Add New Camera" button
- Enter the camera information (name, IP, port)
- Enter the ONVIF username and password
- Click the "ONVIF Auto Config" button
- Select the camera on the next screen
- Click the "Test camera config" button
- Click the "Save" button
And now you should have your camera added to the TV via ONVIF.
When I was writing this article, the TV couldn't display the video with a high frame rate nor update the information on the top of the screen (Bitrate and FPS).
I noticed that the video is choppy, and everything that moves looks "robotic".
Conclusion
It's possible to view an Axis camera on a Roku TV.
It's just a question of choosing the method you want to use and follow the steps in this article to get everything running in about 10 minutes.
You can also use other models with the IP camera viewer.
To add more cameras, you can pay for the Pro version.
Related articles
Here's a list with related article that may help you.
I hope this article can help you; please leave your comments below.
And don't forget to share with your friends 😉
